
We all have a few tired, nondescript, unused baskets lying around! They can be very useful, and why not make them beautiful, too! I would like to show you how to cheer-up your home with painted baskets.

How I find my baskets
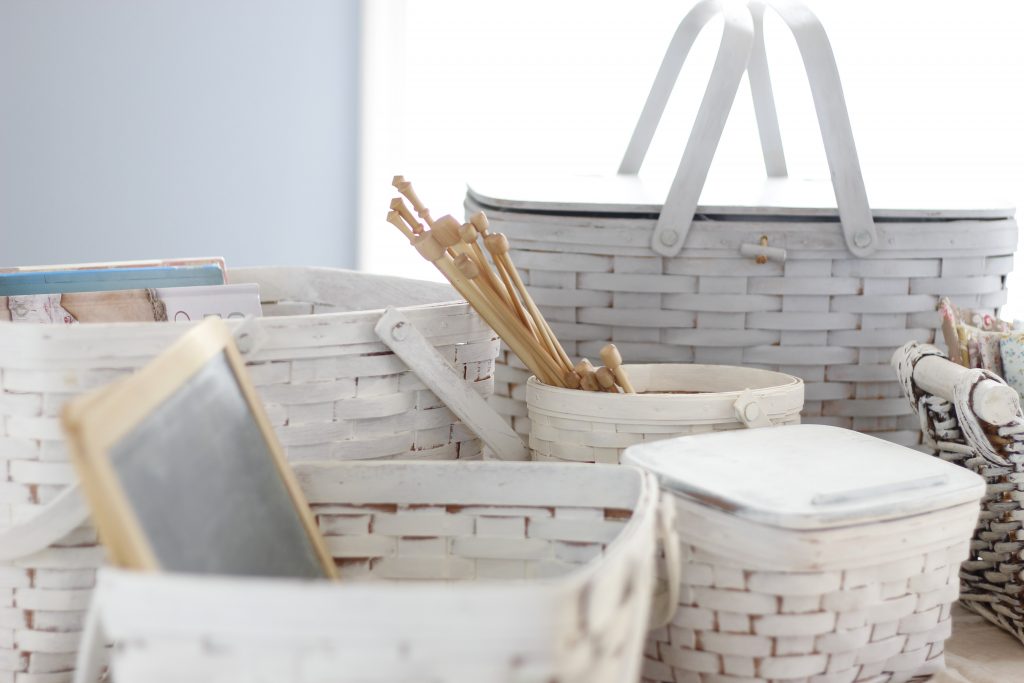
I like having pretty baskets at the ready for holding anything that we want at hand throughout our day. We hold homeschool supplies in baskets. I keep books in painted baskets to set apart for my own reading. Baskets are a handy place to keep a knitting project safe in a busy household. In the above photo, this newly painted basket is holding a collection of fabric and a papier mache ornament that looks pretty together. I want to keep my home tidy and this gives a home to our supplies and belongings. Painted baskets keep a unified appearance that I prefer.
Whenever I shop at a thrift shop or yard sale, I see baskets every time. They are in the world in abundance! I try to look for the size and shape that I like. And if the color of the basket is not what I like, that is okay. I like to paint some my baskets so that they fit in with my style.
Sometimes my mom wants to clear out Longaberger baskets she no longer wants. She always asks me if I would like them. So I ask her, a little tongue in cheek, ” You know what I will do with them, right?” She knows me well, she answers, “Paint them?”
I like to give her fair warning because she paid a lot of money for those baskets a while back, but they are valuable to me only as they serve me in my life. Longaberger baskets are constructed very beautifully and they are wonderfully durable, but I prefer a painted look or when they are aged and darkly stained.
Cheer-up your home
We all have different decorating styles, but baskets can be painted to fit into any style. With some acrylic paint and a chip brush you have a custom organizational item.

Here is a basket that I have had for years, it’s been used for toys and school supplies. I love the shape and the handles, but I have never liked the color. It has a very yellowish-orange stain that isn’t my style. So I finally decided to give it a makeover.
How To Paint Baskets That Will Cheer-up Your Home
For painting my basket, I gathered:
- a large rag on which to paint the basket
- an inexpensive chip brush
- dark brown acrylic paint
- white acrylic paint
- Miss Mustard Seed Antiquing Wax
- a damp rag for cleaning basket before I painted
- small rag for waxing the basket

First, I dusted my basket with a damp rag to remove as much dust out of the cracks as possible.
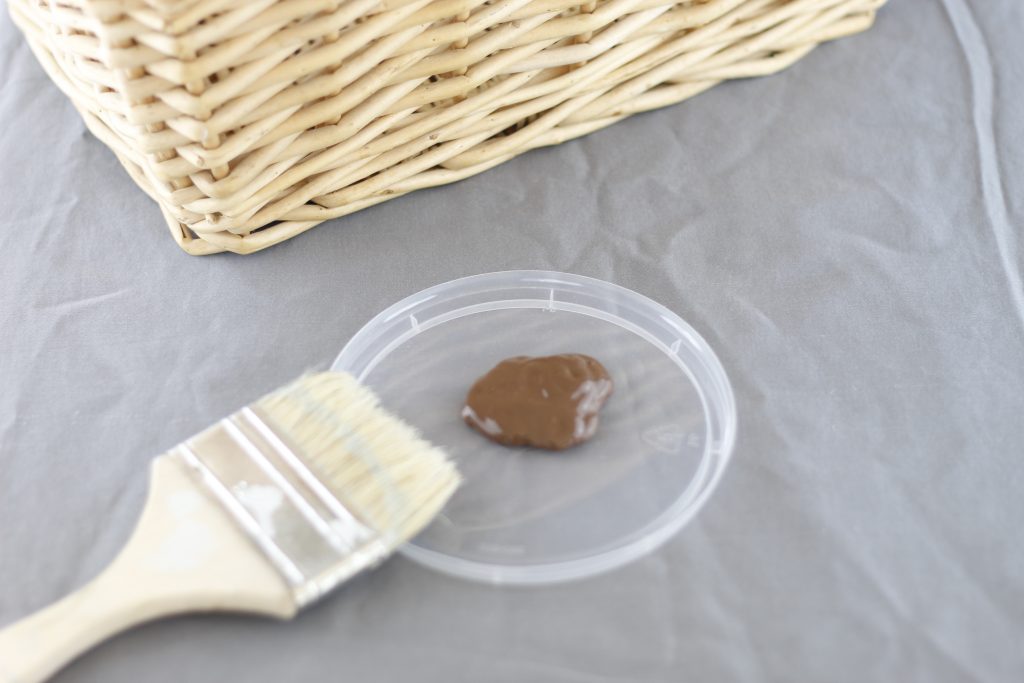
I save large empty yogurt containers for cleaning brushes, or putting papier mache clay into, or storing mixed milk paint for a day or two. The lids also make great surfaces for squeezing acrylic paint onto. This paint is Folk Art brand and the color is ‘Real Brown’.
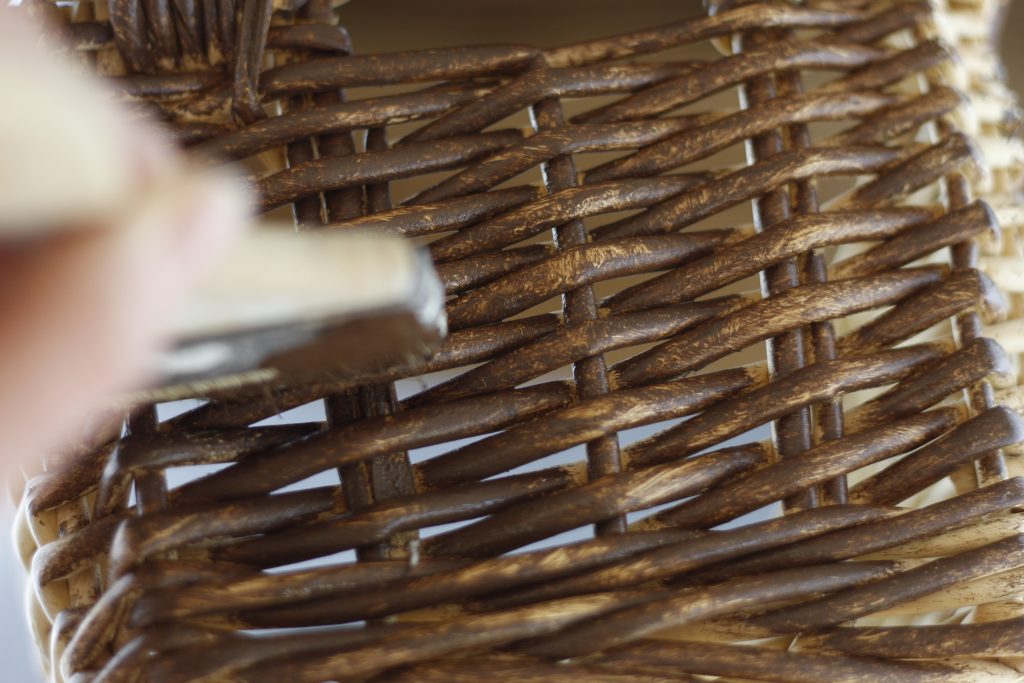
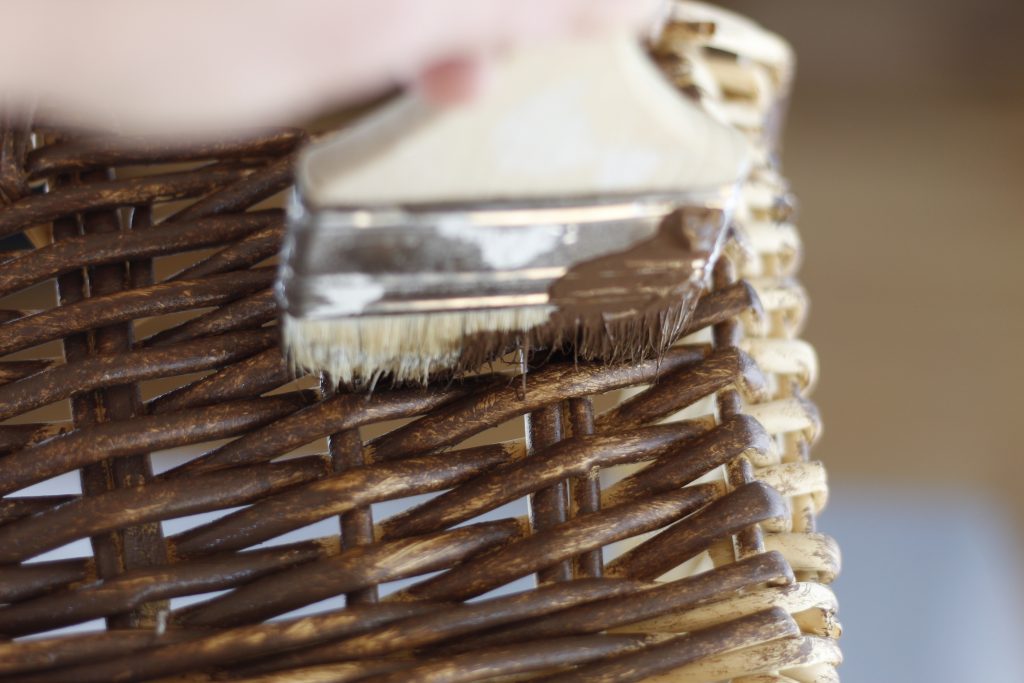
Painting the sides of the basket first, I pushed the brush into all the crevices at all the angles. Keeping my brush lightly coated in paint, I dry brushed my basket.

I like to put a coat of brown paint on baskets first to give it an aged look that can layer on under lighter colors.


After those steps were finished, I painted the inside brown.


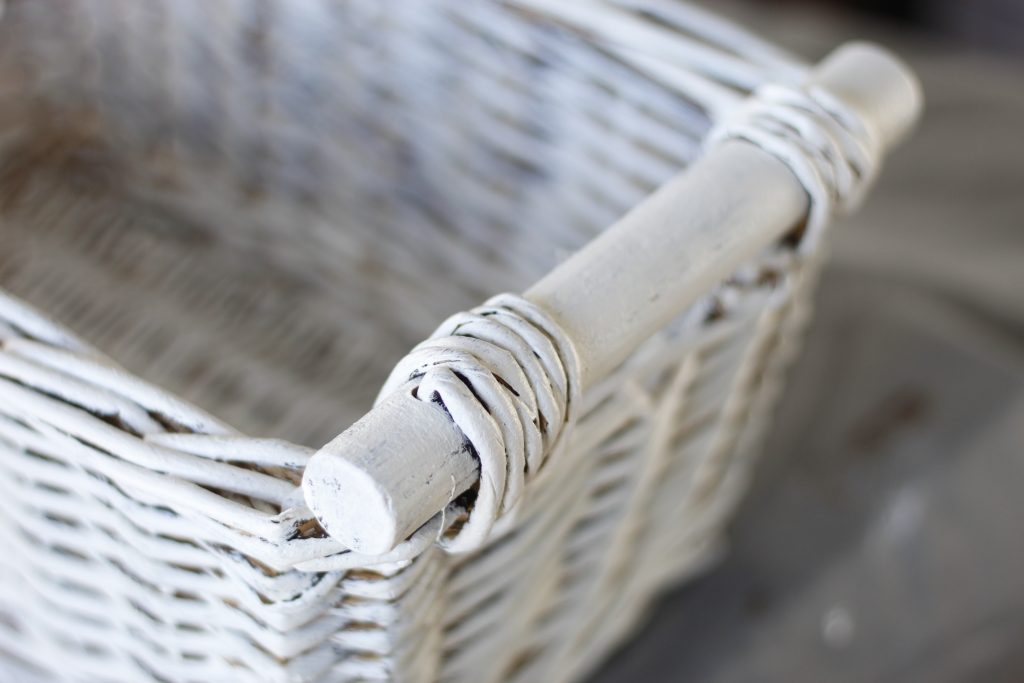
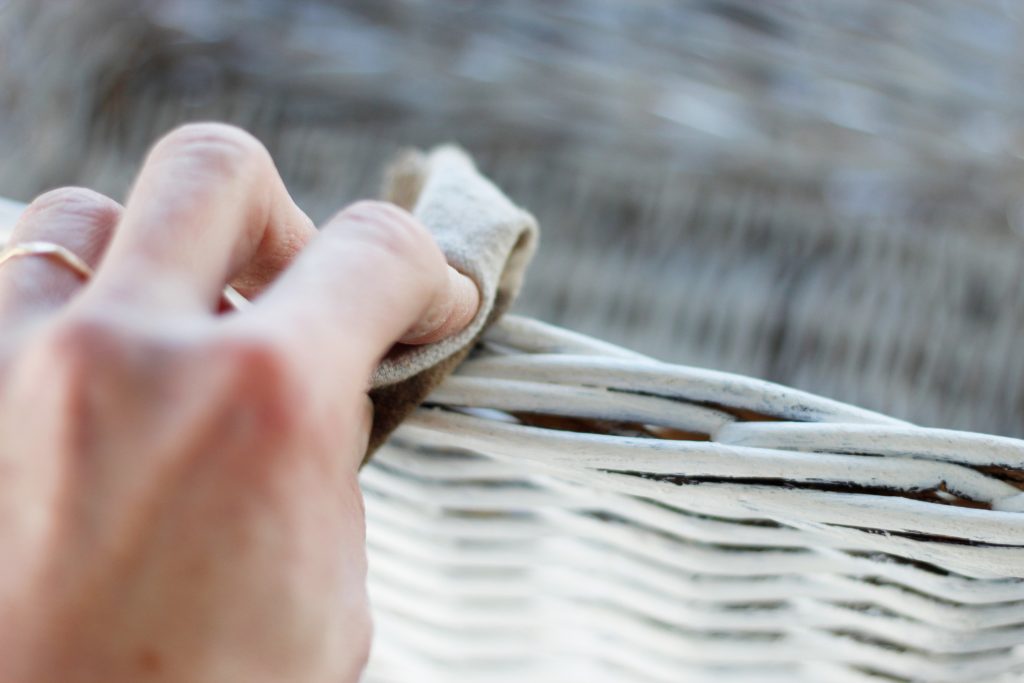
Next, I cleaned my chip brush and repeated the steps with the white paint. This paint is Folk Art brand and the color is ‘Wicker White’. Also, I was thorough around the handles so they looked painted but not too perfectly covered. I wanted them to look aged.

After my Painted Basket was dry:
After a half an hour my basket was dry. Then it was time to wax my basket. I used Miss Mustard Seeds’ Antiquing Wax so that my basket wasn’t too perfectly white. I wanted it to look old.
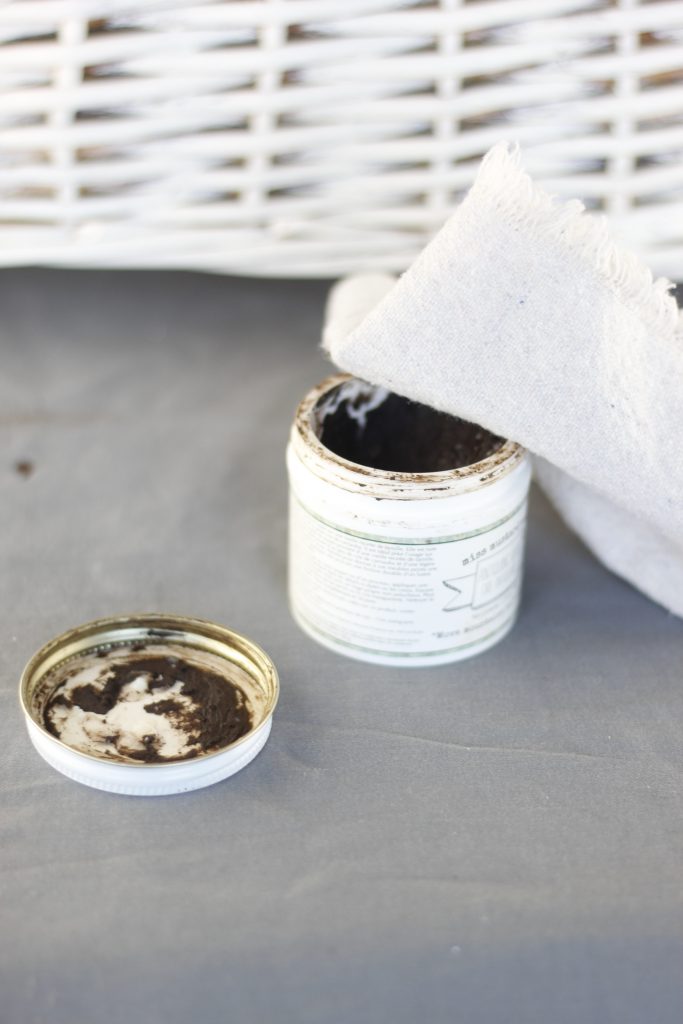
Finally, I was nearing the finish of cheering-up my home with a painted basket and I was ready to wax! I took my small rag and put a very small amount of antiquing wax on a corner of the rag.
I started rubbing a little bit at a time on the handles, I made them look nicely used and worn.
Then I rubbed a little of the wax on the sides and bottom. I finished the waxing of the inside, and let it dry for 10-15 minutes.
After that, with a clean section of my rag, I rubbed off any excess of wax that didn’t dry.

After my basket was dry I filled it with pretty fat quarters, scissors, and my travel sewing kit. These were items that were on the surface of my work space. Placing them in the basket keeps them tidy, but still visible and ready to use!
Furthermore, I feel a lot of our belongings look neater when they are stored in baskets.
How Do You Cheer-up Your Home With Painted Baskets?
First you find various baskets that appeal to you based on size and shape
Then, decide what color works best in your home, to give a unified look.
Also, decide whether you would like your baskets to look old or new.
And then gather painting supplies and enjoy the process of small changes making large impacts in your home! Cheer-up your home with painted baskets!
If you like to repaint your finds to make them prettier, you may like this post.
What paint colors would you like to use on baskets? Are there any other ways you have changed the look of baskets? Please let me know in the comments below!

Leave a Reply