
Easter is the time of year when we begin to focus on renewal and new birth. The egg is a symbol of the newness that we are all seeking. After a long dark winter, Easter is a pivotal time when we anticipate Spring and the freshness of life and growth. Join me in celebrating new life and put your hands to making Easter Eggs With Easy Plant Dyes!
Naturally Unpredictable
Natural dyes have always fascinated me, the colors are very different from chemical dyes. The pigments have a tendency to be subtle and uneven. Therefore, natural dyes are somewhat unpredictable. But, this means it is a great chance for an experiment. If unsure of the color a plant will give, give it a try! Imperfections and uneven color both work toward making what you are dyeing even more beautiful! If tea-dyeing fabric is an interest, read this post. And this is a project I love to sew from my tea-dyed fabric.
Plants That Make Great Dyes For Easter Eggs
All the ingredients for making Easter eggs with plant dyes are found in the produce aisle of a grocery store.
Here are the plants that produce consistent colors:
- Red- beets, cherries
- Orange- carrots, yellow onion skins, orange peels, yams
- Yellow- lemon peels, turmeric (fresh or dry and powdered)
- Pink- red cabbage, raspberries, cranberries
- Blue- red cabbage, blueberries, purple sweet potatoes
- Green- spinach, kale, dandelion greens, cilantro, Matcha tea
- Peach- avocado peels and pits
As you can see, these very accessible plants provide a rainbow of colors!
Supplies To Gather:
- A dozen white eggs
- Fruits and vegetables that will produce the colors you desire
- Water
- Pans for simmering dyes
- White vinegar
- Olive oil
- One-quart jars
- Knife
- Cutting board

How To Make Plant Dyes For Easter Eggs
First Step:
Choose a fruit or vegetable to begin with, and rinse with cool water to remove any dirt or debris. I’ve started with red cabbage and chopped it into pieces that are about one-inch sized. A good plant-to-water ratio is 1:2, so I have used one cup of vegetables or fruit and two cups of water. One exception I’ve made to this- I have used two cups of red cabbage because I want that to be a blue dye, rather than pink.
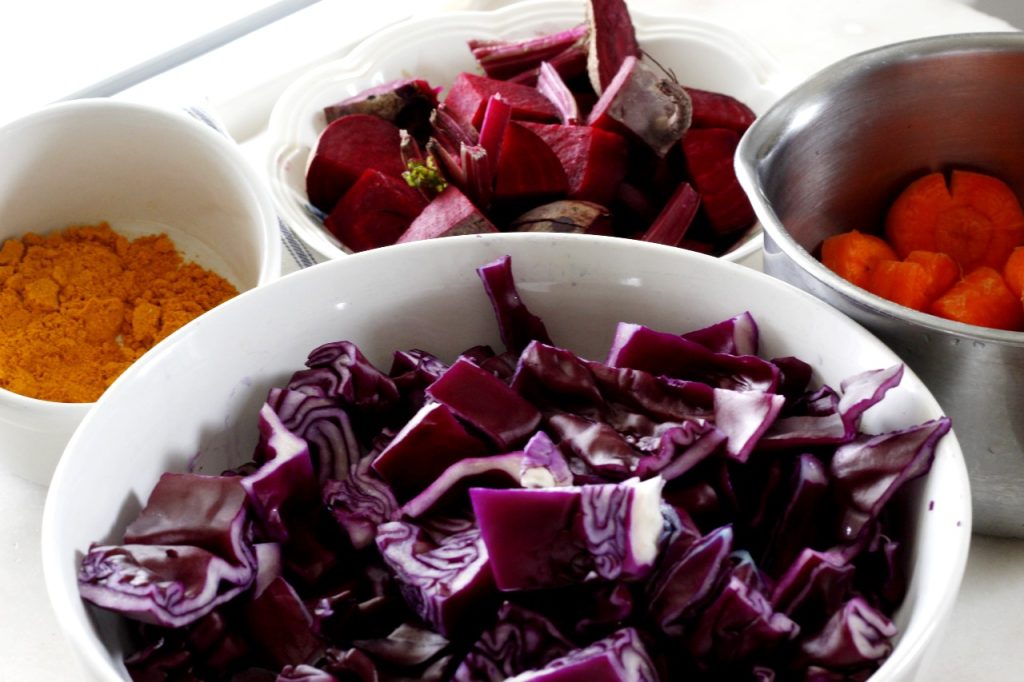
For the beets, I’ve cut about a cup of beets into one inch pieces, including the skin and red part of the stems, and placed them in a bowl.
And for green, I’ve measured out one cup of frozen spinach into a bowl. Also, I have added one tablespoon of Matcha powder to increase the green. I’ve decided on turmeric for a yellow, and I’ve used one tablespoon.

If you are using avocado peels and pits, they can be saved in a plastic bag and stored in the refrigerator until you are ready to make your dye.
Any fruits or vegetables from the above list can be prepped in the same way- rinsing and chopping, or just measuring, if frozen.
Second Step:
I’m can fit four pans onto my stovetop at once, so I’ve made four of the dyes at the same time.
So, put one cup of fruits or vegetables into your pan and cover with two cups of water and bring to a boil. Turn down the temperature and simmer for 30 minutes.
Remove the pans from the stovetop and allow the liquid to cool completely.
If these pans are needed for further batches of dye, let them cool for a few minutes and then carefully ladle out the plants and liquid into bowls to cool. In that case, rinse your pan before proceeding with another dye, so that the colors don’t blend.
Third Step:
Next, strain each of your dyes through a colander and pour into a clean one-quart glass jar.
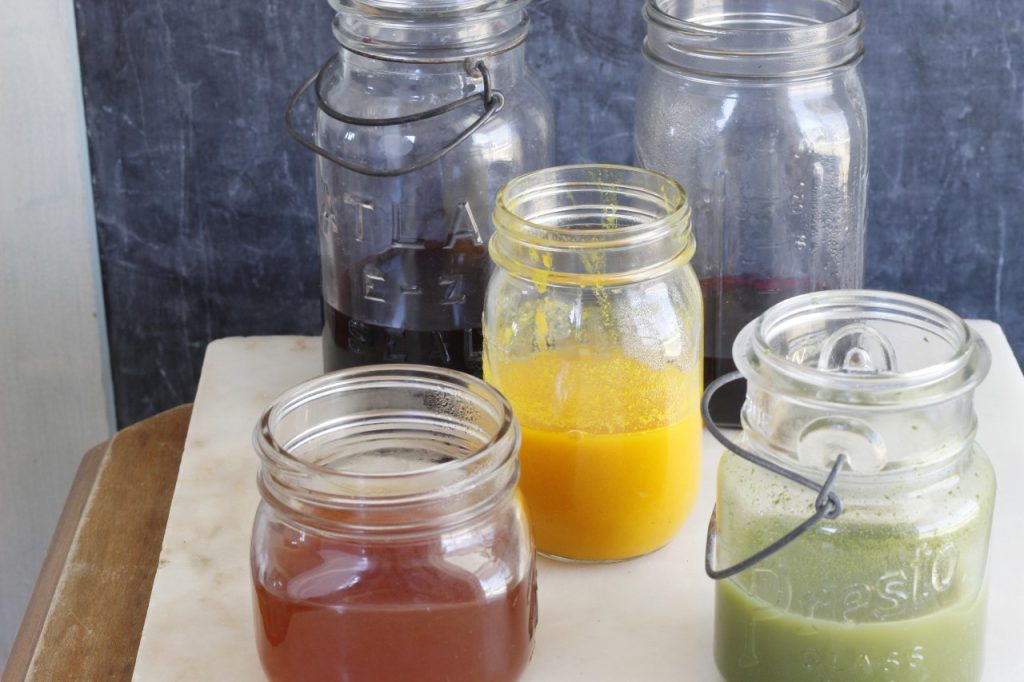
Fourth Step:
Once your dyes are poured into jars, add one tablespoon of white vinegar to each jar. This helps the colors to adhere, or fix, to the eggs.
Furthermore, if you are not using your plant dyes immediately, they can be stored in the refrigerator until you are ready for them.
Fifth Step:
Now it is time to hard-boil your eggs. Here is my favorite method for hard-boiling eggs:
I put all my eggs into a large pan, completely cover the eggs with water, and bring them to a rolling boil for one minute. Next, I turn off the stove burner and keep the pan there for ten minutes.
Anytime I have hard-boiled eggs with this method, they have been cooked solid the whole way through.
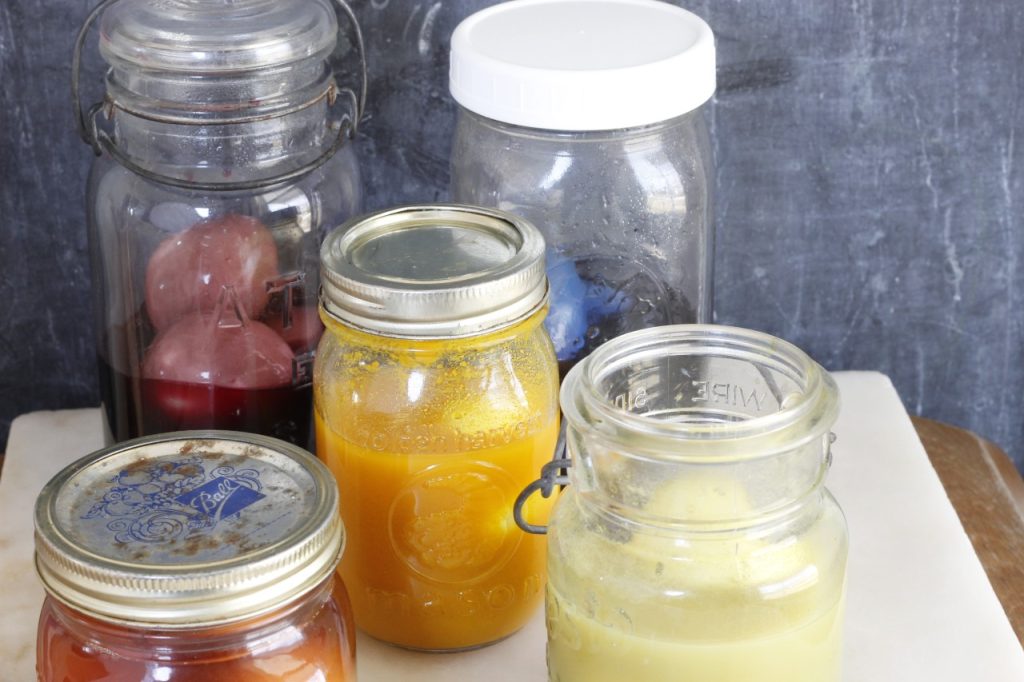
Turn Plain Eggs Into Easter Eggs
Once your eggs are finished cooking, carefully ladle them out of the pan ( you don’t want them to crack!), and into your jars of plant dyes. From there, the jars can be put into the refrigerator overnight to allow the plant dyes to penetrate the shells.
Alternatively:
Dip the eggs in the plant dyes repeatedly for more color saturation. This will layer the color, which results in brighter Easter Eggs. Then, after 30 minutes, remove the eggs from the dye baths and place them on paper towels, allowing them to dry. Then place the eggs back in the dye baths and repeat the process two more times.
Or:
You can try a hybrid of the two techniques, which is what I have done. I placed my eggs in the dye baths for 30 minutes, removed them, and then placed them back into the jars. From there, I placed the jars into the refrigerator overnight.
Shine Your Easter Eggs
Your naturally dyed Easter Eggs can remain as they are or you can shine them up, once they are completely dry. Applying a little bit of oil will deepen the color. Simply put a small amount at a time onto a paper towel and rub it onto your Easter Eggs.

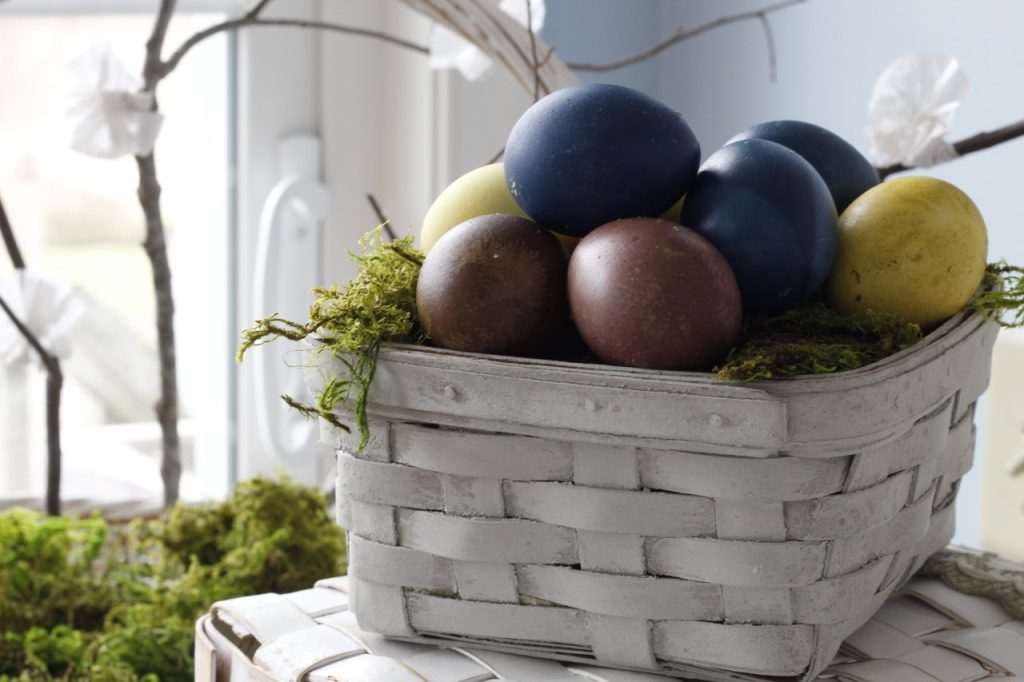
My results
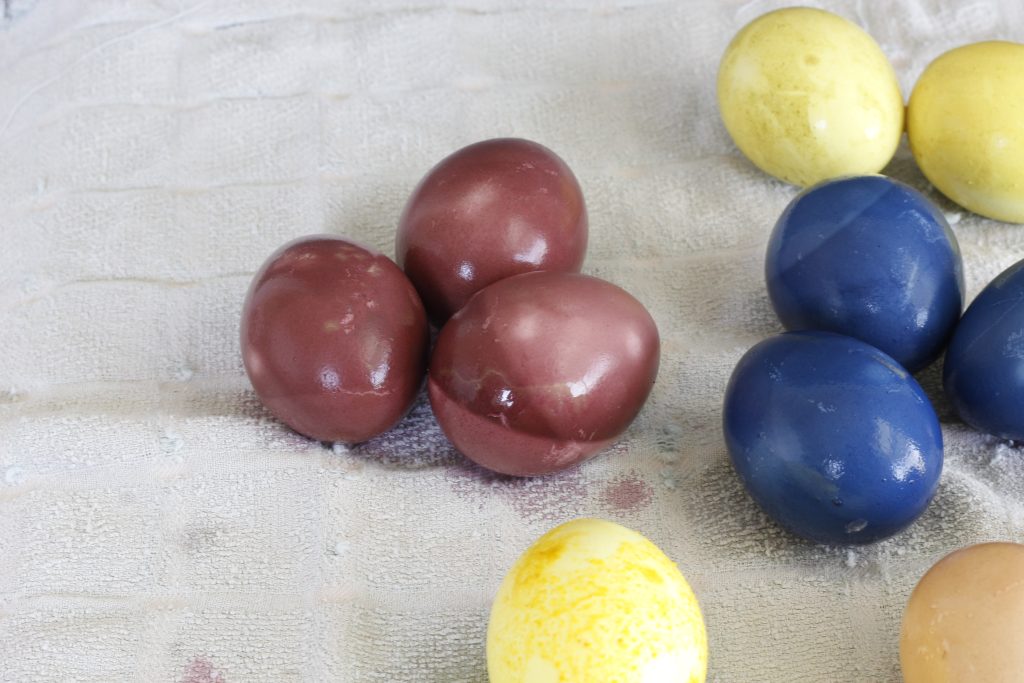
My result from using red cabbage for the blue is a brilliant deep color. Using beets for the red has resulted in a purple-red, which I think is pretty as well, but not what I was expecting.
What has surprised me the most has been the final color from the avocado pit and peels. Initially, the Easter Eggs dyed with avocado were tan. After a little time passed, their tan color turned to a rusty red, so I got my red from an unexpected source!
The green eggs are very light greenish-yellow. Turmeric dyed the yellow eggs nicely, and they ended up with some reddish specks as well, which is interesting and unique. Next time I will try to get pink to be successful. Maybe I will try the raspberries.
Overall, I am happy with my plant-dyed Easter Eggs.
Benefits Of Using Natural Plant Dyes
Why do I choose to make my own natural plant dyes for my Easter Eggs?
In the first place, anytime we learn to make something for ourselves, we have a valuable life skill!
Additionally, the colors are so much more beautiful when using plant dyes!
Also, natural plant dyes are not manufactured in factories and we can trust they are safe to be absorbed by our skin when we handle them!
Is It Safe To Eat Your Easter Eggs?
It is completely safe to eat natural plant-dyed Easter Eggs, as long as they have been refrigerated within two hours after cooking. If they are used during an egg hunt or in an Easter basket, return them to the refrigerator within two hours time. Chances of food-borne illness increase as they are left out of refrigeration. So, if you plan to eat them, be sure to get your Easter Eggs back into the refrigerator within two hours of using them.
So, I hope that you give this Easter Egg dyeing alternative a try! I would love to see which fruits and vegetables you have decided on, and your color results. Please let me know in the comments below!
Happy Easter!
Courtney

Leave a Reply