
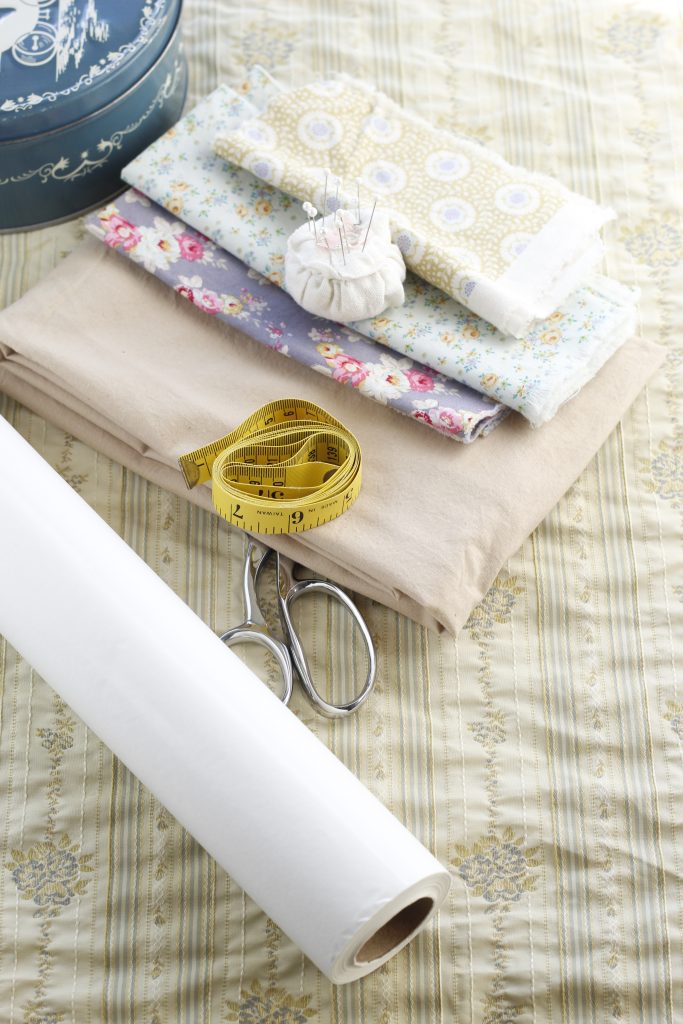
Now that Spring is here, I am resuming my warm weather laundry routine. I prefer air drying my laundry, I love the fresh smell and the crisp texture. My clothespin bag has lasted eight years of hanging out my laundry, and I wanted something new. So I decided to learn the process of how to make a clothespin bag.
Years ago, my grandmother made me a clothespin bag that I have used faithfully ever since. The one she sewed for me is dark blue, calico fabric. It is basic and hangs by a wooden hanger.
I wanted to design a fun, unusual sort of clothespin bag. Because no other creature is more busy with housekeeping than a bee, I chose to make my clothespin bag a bee hive!
A task that is as ordinary and routine as laundry can be made more enjoyable by taking the time to make a pretty place to put my clothespins. As simple as it sounds, sometimes that is all it takes to accepting the chore at hand!
Designing A Clothespin Bag
Considering the fact that I had no sewing pattern to follow, I needed to make my own pattern. For pattern paper, I use the kind of paper used on the tables in doctor’s offices. This is a good one. The paper is transparent, but strong enough to be used repeatedly as a sewing pattern.
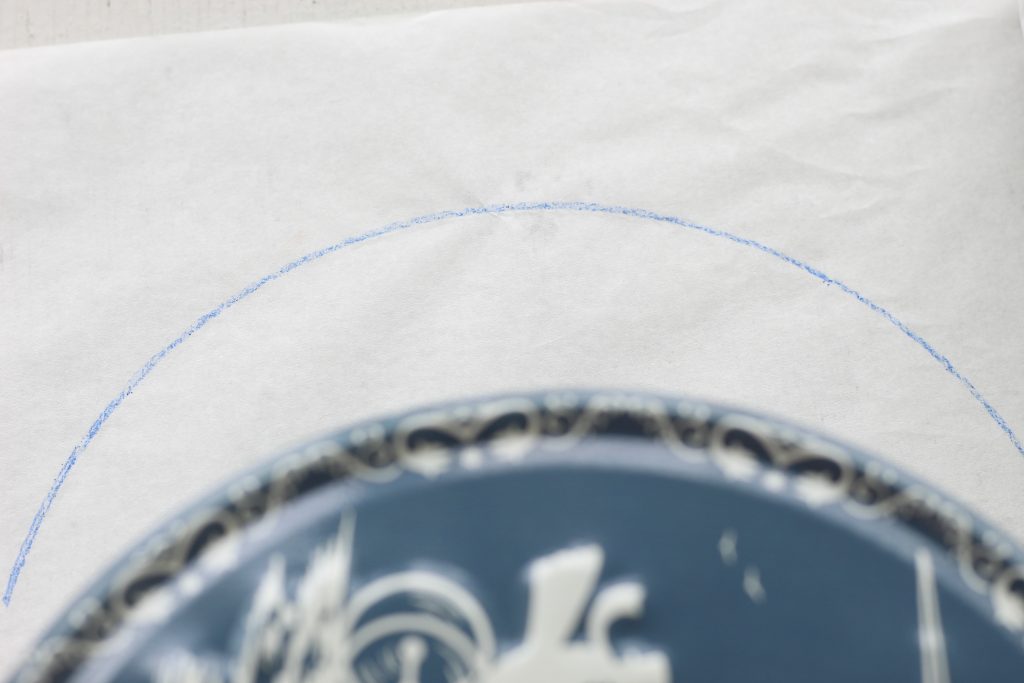
First, I needed to trace a rounded line as the top of my beehive. I was looking for a rounded object and found a cake tin that looked like it would be the right size.

Next, I unrolled my paper and placed my tin so that there would be plenty of space to draw my beehive. After that, I traced a curved line onto the paper near the top edge of the paper. My traced curved line was about 8 inches long.

Following tracing the top curved line, I sketched the sides of the beehive. I made the length 16 inches from the top to bottom. I lightly sketched with pencil until it looked pretty even on both sides, and then went back over it with chalk.

Next, I drew the bottom of the beehive with a bit of a curve, because that will help it to have a gentle line along the bottom instead of a sharp one. My pattern was evenly sized and when I cut it out, I evened up the lines of the pattern with my scissors that I use for paper.
Cutting Out A Clothespin Bag
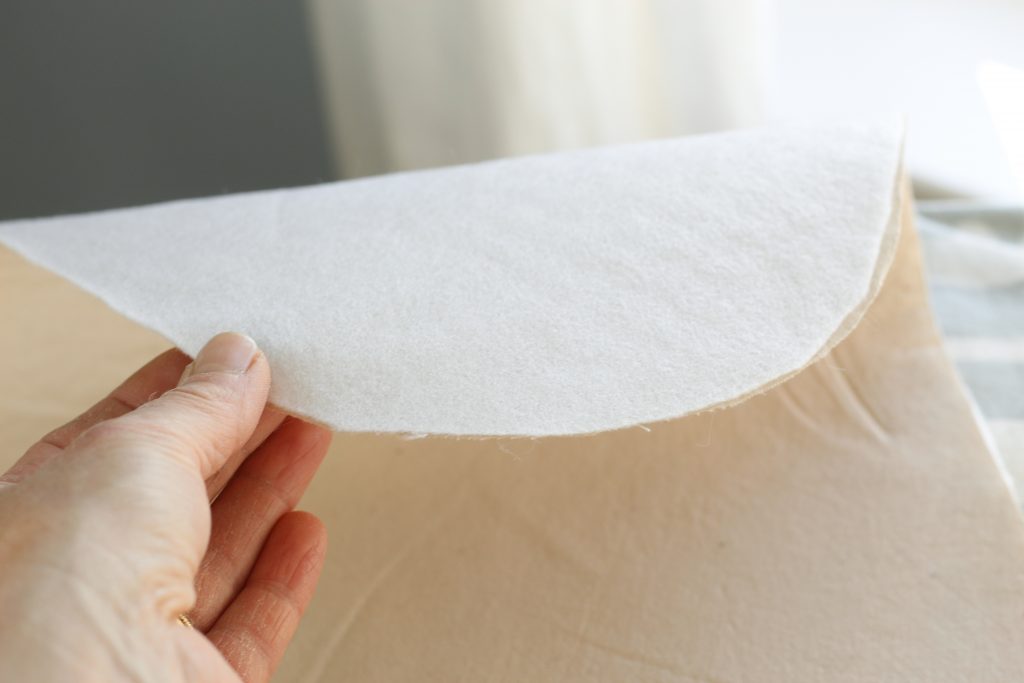
My fabric choice was a tan muslin, which is very lightweight. I added a layer of fusible fleece because the fabric needed a little more structure.
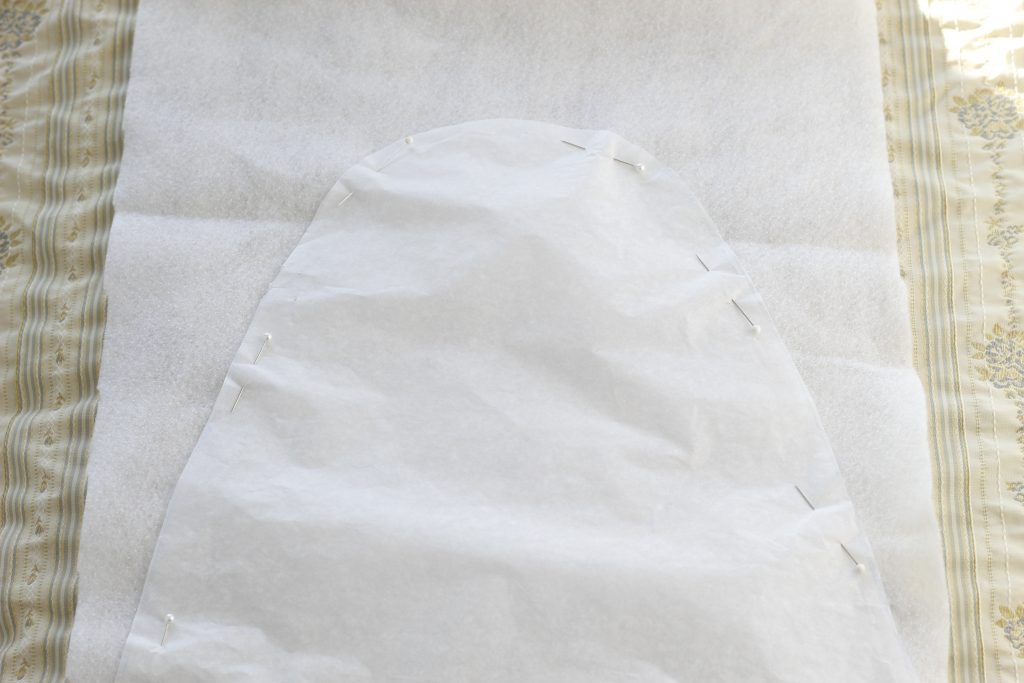
After pinning my pattern to the fusible fleece, I cut it out. I decided to use one layer, just for the front of the beehive, as I was going to do some topstitching on that layer.

I ironed the glue side down on the wrong side of my tan fabric. Your iron needs to be hot to make the glue adhere to your fabric, because of this, you should not hold it on the fusible fleece for too long in one place. Holding it in one place for too long causes it to melt and can make a mess on your iron!
I cut four layers of the tan muslin for the beehive and put fusible fleece on the back of one layer.

Pinning And Sewing
Next, I pinned two layers of the tan fabric without the fusible fleece. Placing the pins with the head by the edge, and the pin perpendicular to the edge, makes it easier to remove them as you sew the seam.
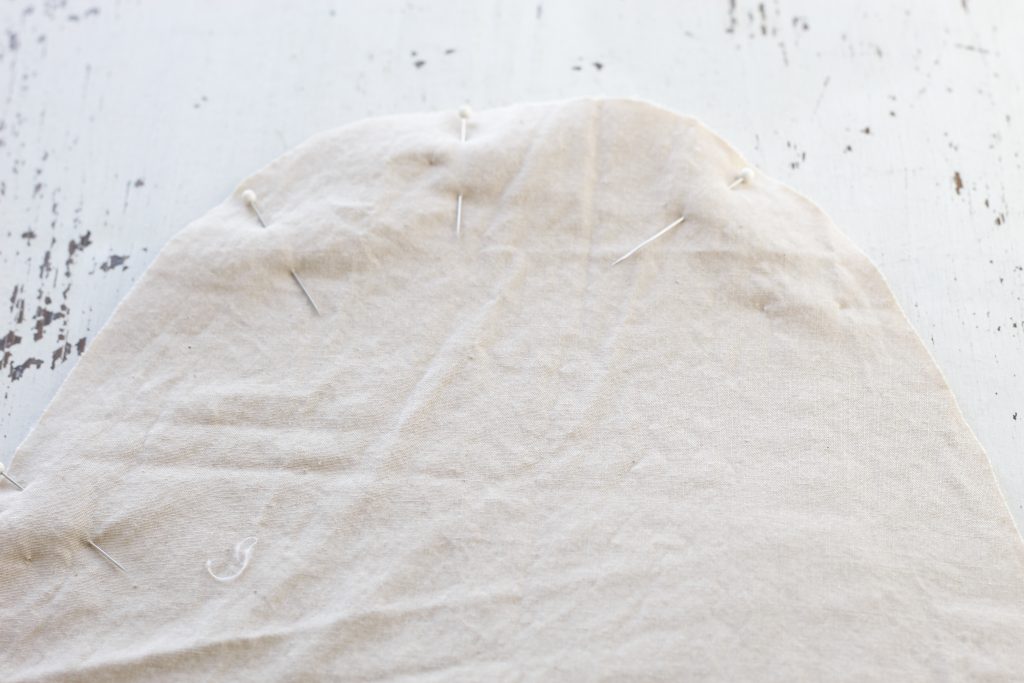
The next step was to pin, right sides together, the third piece of tan fabric to the piece that has been fused to the fleece. So, this part of the project was pinned together like a sandwich, fabric- fabric- fleece.


Then, I sewed these two layers together with a 3/8 inch seam, starting at one bottom corner and going around the curve and ending at the other corner. I sewed the other two layers together in the same fashion, keeping the bottoms open.
Following that step, I turned my two parts of my beehive right sides out. I pushed against the seam with my hand on the inside of each to get a flat, neat edge. Then I pressed both halves of the beehive clothespin bag with a hot iron.

Each side looked like this.
Topstitching

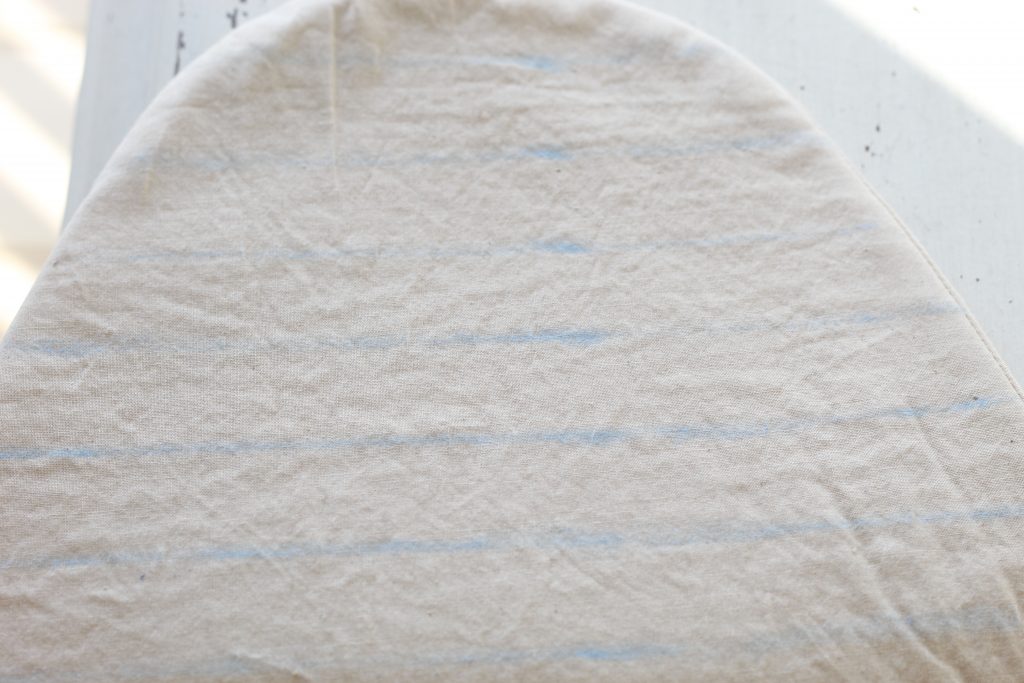
I wanted this clothespin bag to look like a beehive. So, I decided to topstitch lines onto it. That would make it look like an old-fashioned beehive. So, I measured and marked the height of the structured beehive half with the fusible fleece, in 1 inch markings. I used blue tailor’s chalk to do the marking.
After marking the fabric with the measuring tape, I made lines across the fabric using my chalk and a yard stick.
I topstitched only the front of the beehive to keep the project more simple, and also because I put the fusible fleece on the front section only. But if you wish, you can easily add the fleece onto the other half and topstitch that part too. That would make sewing the two halves together more bulky, which is worth considering.

I decided to not topstitch the very bottom line. That would probably interfere with sewing the two halves together, and that saved a bit of effort.
I pressed my topstitching with my iron, and made the back side into the right side from this point. Then the chalk markings were not visible.
Adding Pretty Elements

To make a little doorway on the beehive, I used a brown linen scrap from my fabric stash. I drew a rounded door shape onto my pattern paper and pinned the pattern to the fabric, then cut it out.

Following the cutting, I pressed 1/4 inch hem around the edge of the door. It is difficult to fold around the top curve, you can see mine is a little uneven!
I chose two floral fabric scraps that I cut small rectangles from because I wanted to add a pretty and whimsical touch. I pinned on the door and bottom rectangle, then topstitched close to the edge. It was my decision to leave the rectangles unhemmed, so that they would have a sweet little fray around the edges.


After I sewed the blue rectangle and door, I sewed on the wheat-colored rectangle.
Adding Straps And Sewing It Together
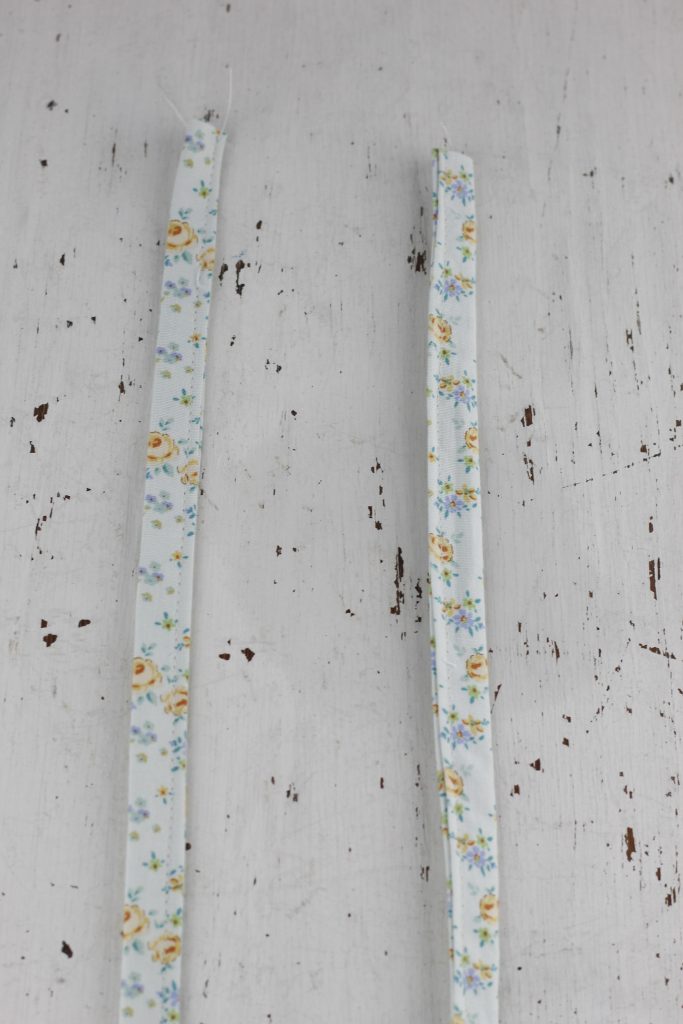
To make the straps, I cut 2 inch strips of the blue flowered fabric to make the straps. I had to cut four strips and sew them together to get the length I needed for the straps. I made them about 16 inches long. After I sewed two strips together, I pressed the seams open and then folded it in half lengthwise wrong sides facing. I pressed the length of the strap and then opened the strap to lie flat.
My next step was to fold in the long raw edges to meet in the middle crease. I pressed those folds flat. Finally, I folded it in half again and pressed the length of the strap. This process enclosed the raw edges completely. Another step I took with my straps was to enclose one short side’s raw edge inside before I pressed the entire length. After that, I topstitched along the open side length of the strap.


I measured and made marks 6 inches down on sides to topstitch and attach the hanging straps to the clothespin bag. Then I topstitched both the front and back sides of the beehive. Next, I pinned, leaving the topstitched sections open, and sewed the sides and bottom together using a 3/8 inch seam allowance.
The bottom seam was a bit bulky, so I trimmed it and sewed a zig-zag seam to enclose the raw edge.


The next step was turning the beehive right side out and pressing the sides and bottom.
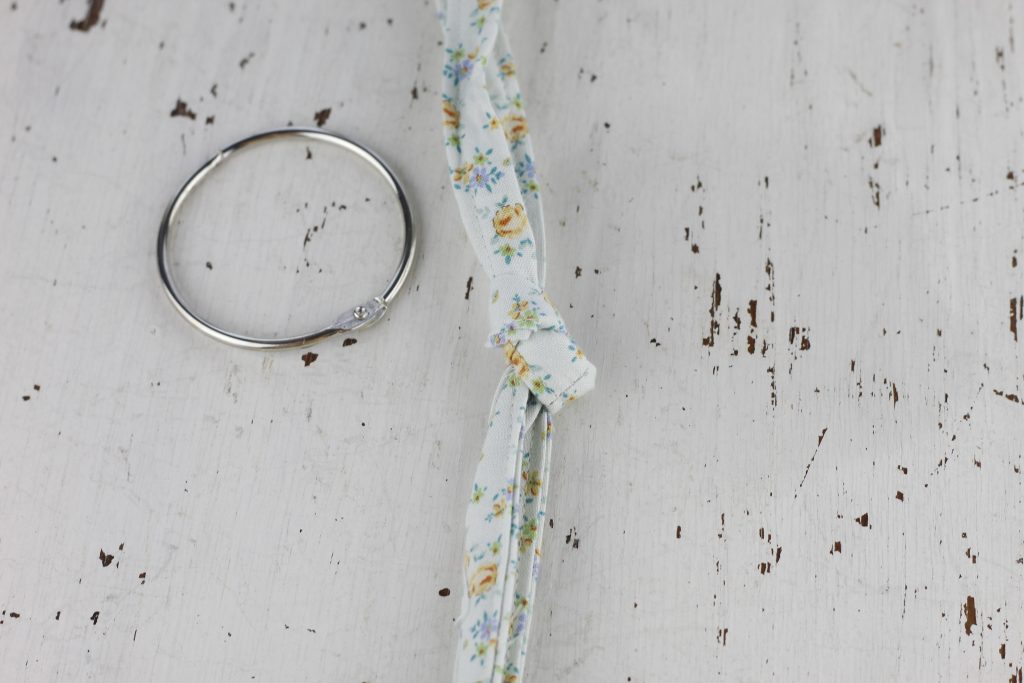
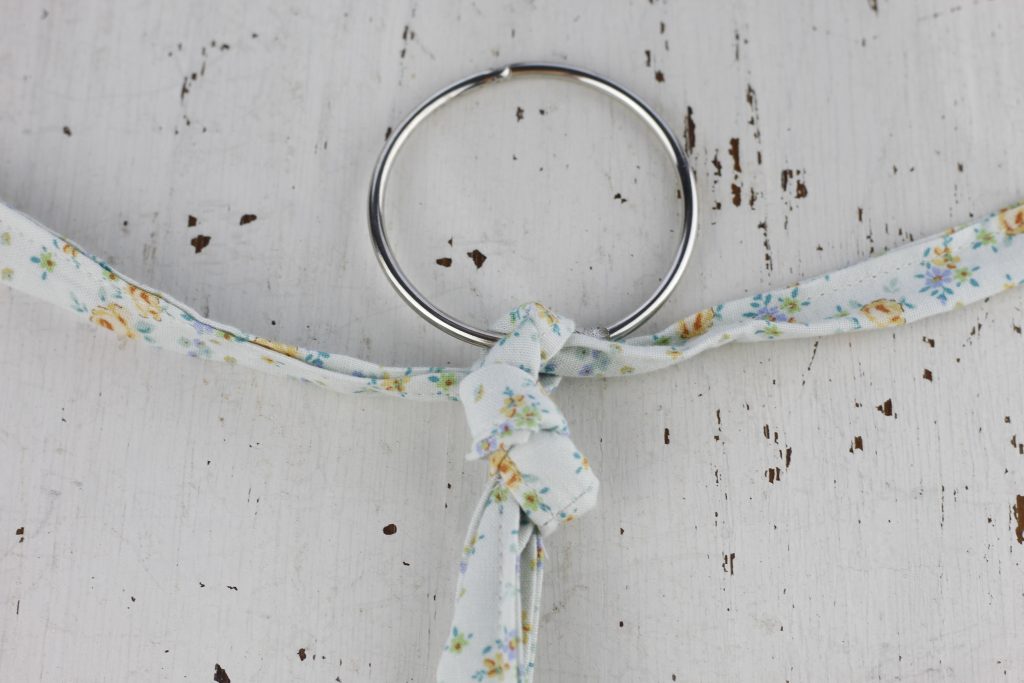
I used this type of ring to hang my clothespin bag on the clothesline, knotting the straps together. Then I slipped the ring between the straps and knotted them to the ring.
Finally, I tied the straps into a neat, pretty bow.


So, overall I really love how this beehive clothespin bag turned out! I hope you give this project a try. Please tell me about it in the comments below!
Check out my other sewing tutorials here and here. Happy Sewing!
Looks adorable! Can’t wait to try it!
This is adorable! I love your choice of fabric patterns. Thanks 🙂
This is so adorable and very thoughtful! What a smart thing to make.
Such a cute and rustic design. I love the fabrics you chose! 😍
This is darling! Can’t wait to try this!!
Hi
I love the design but I cannot seem to find the opening to get the pegs out? Can you tell me please where in your tutorial shows where to do the opening . Thank you so much.
Hello. Thanks for your good question. My paragraph that begins “I measured and made marks 6 inches down on sides….” is where you will find that part. The front of the bag and the back of the bag are each topstitched separately and then they are placed right sides together. So in this way you can leave the top open and not stitched together and that is where the opening is made.
Please let me know if this doesn’t make sense and I can help further. Thanks for reaching out!