
This rustic linen gingerbread man ornament is a sweet and simple sewing project. If you prefer Christmas decorations with your hand-made touch, give this project a try!

When the calendar page turns to November, I feel cozy and inspired. Sometimes this inspiration leads to making a few new Christmas tree ornaments to add to our traditional decorations. If they are simple and quick, it is fun and relaxing, and no pressure!
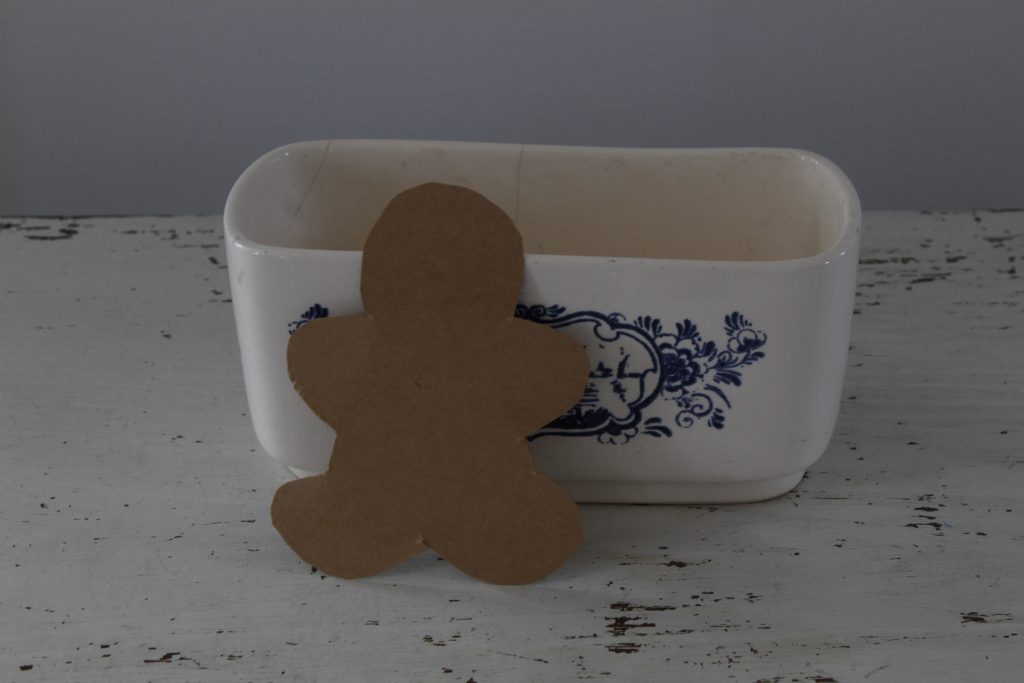
Rustic and handmade suits my style. Natural fibers and colors are my favorite for our Christmas tree, and shades of brown are the natural state for real gingerbread men. Here, I made my ornament out of tea-dyed linen. You can learn about that here.
But you should use the colors and fabrics that you prefer!

Things To Gather For A Gingerbread Man Ornament
The Pattern:
- gingerbread man cookie cutter
- pen
- cardstock
- scissors you use for paper
The Sewing Supplies:
- fabric
- fabric marking pen
- fabric scissors
- sewing machine
- matching thread
Using A Cookie Cutter As A Template

Because a simple pattern is necessary for the gingerbread man ornament, a cookie cutter makes the perfect template. Cookie cutters usually are a simple outline that can be traced easily.
This gingerbread man cookie cutter has been a family favorite for a long time. He has been cutting out cookies year after year.
My cookie cutter is 3 1/2 inches wide and 4 1/2 inches long. These dimensions are a good size to allow ease with sewing and turning the sewn gingerbread man right side out.
A smaller sized cookie cutter will make the sewing a little more challenging. But this project will still work if you only have smaller cookie cutter. Just slow down your sewing, taking more time around the curves.
Tracing Your Gingerbread Man

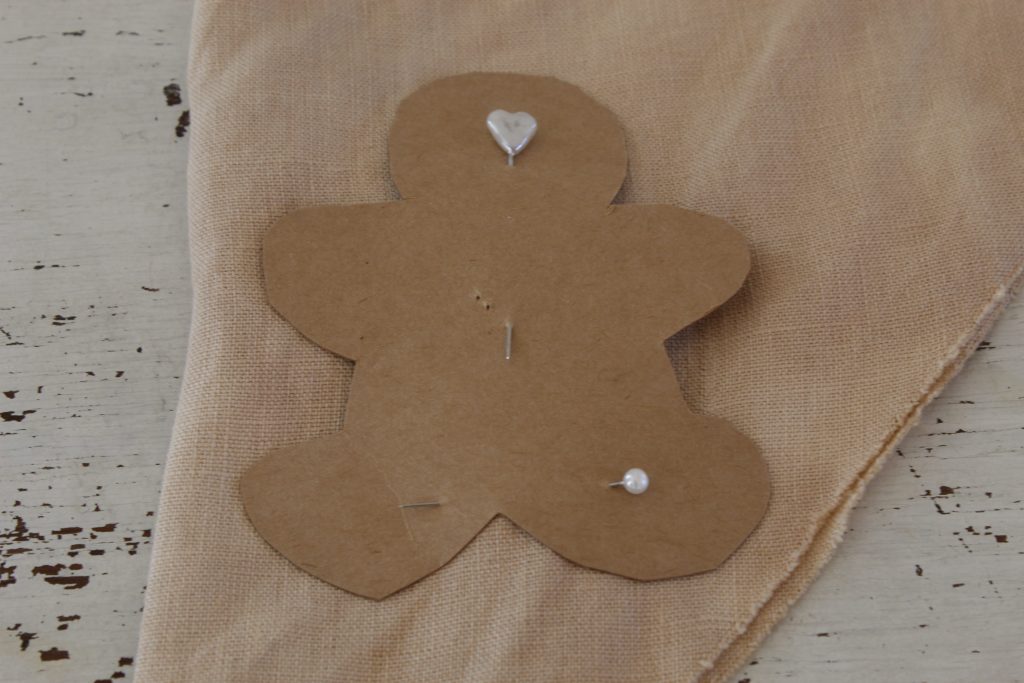
I recommend tracing your gingerbread man onto cardstock or paper rather than directly onto fabric. I have tried tracing the cookie cutter straight onto my fabric and it was a difficult to get the shape to be as accurate.
To keep it secure, I pushed my palm down onto the cookie cutter, and angled my pen point diagonally against the edge as I traced.


My next step was to cut out my cardstock gingerbread man ornament pattern.
Tracing Your Pattern Onto Fabric
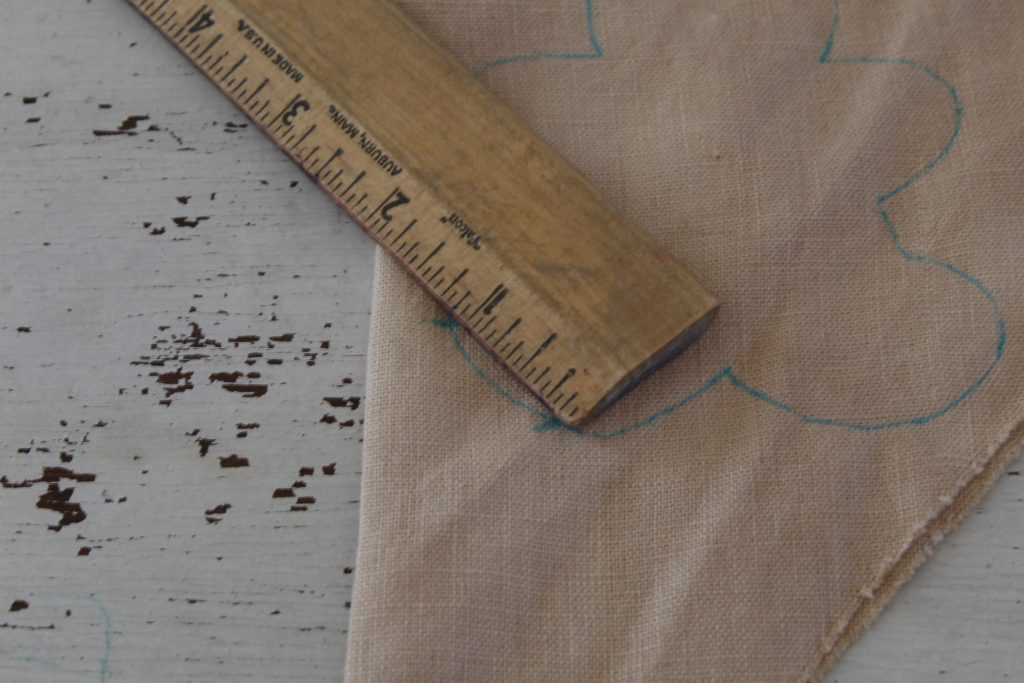
First, I folded my fabric into a double layer, right sides together. I ensured that it was straight and neat.
I placed my gingerbread man ornament pattern onto the fabric, and pinned it in place.
A good practice is to place your pattern near an edge rather than somewhere in the middle.
In my early days of sewing, I often overlooked this point. As a result, I cut up pieces of fabric into awkward sizes. The extra fabric was often too small for use, even on small projects like this one.

When I trace onto fabric, I prefer to use a water soluble fabric marker. As a result, if any marks show on the right side of my ornament, I can dab them with a damp cloth and they can be removed.

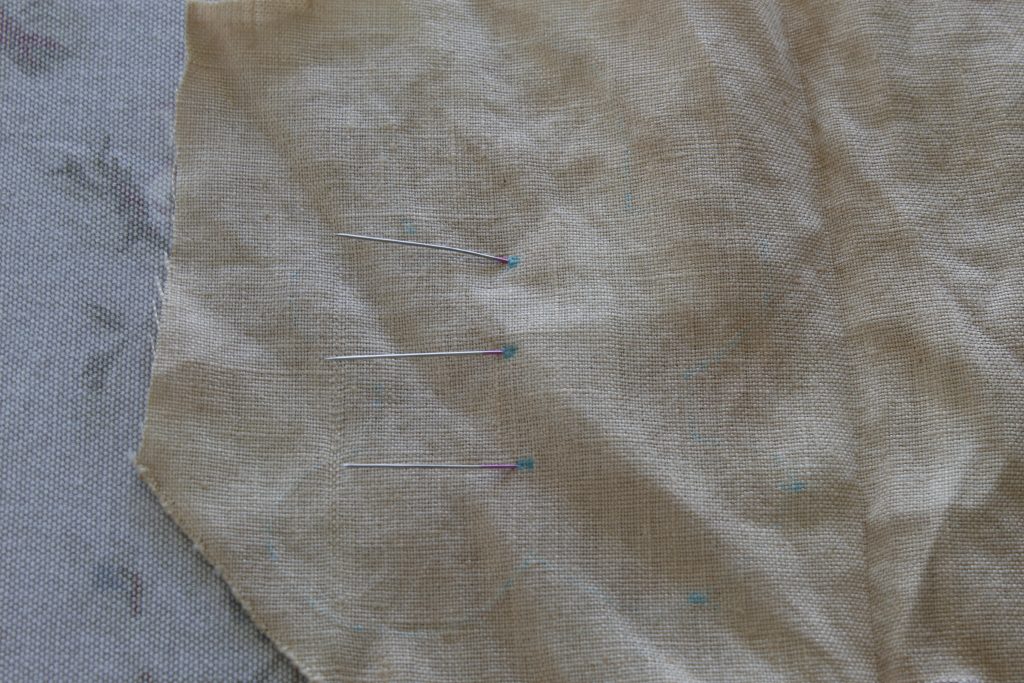
After tracing the pattern onto my linen fabric, I removed my pattern and marked two small lines, an inch apart. These indicated where I reserved an opening for turning my ornament right side out.
Here is a tip to make sewing this little ornament less cumbersome. I cut my gingerbread man ornament from my larger portion of fabric. I ensured there was at least 1/2 inch clearance on all the sides. Keeping this margin is important because it will give plenty of space for a secure seam.

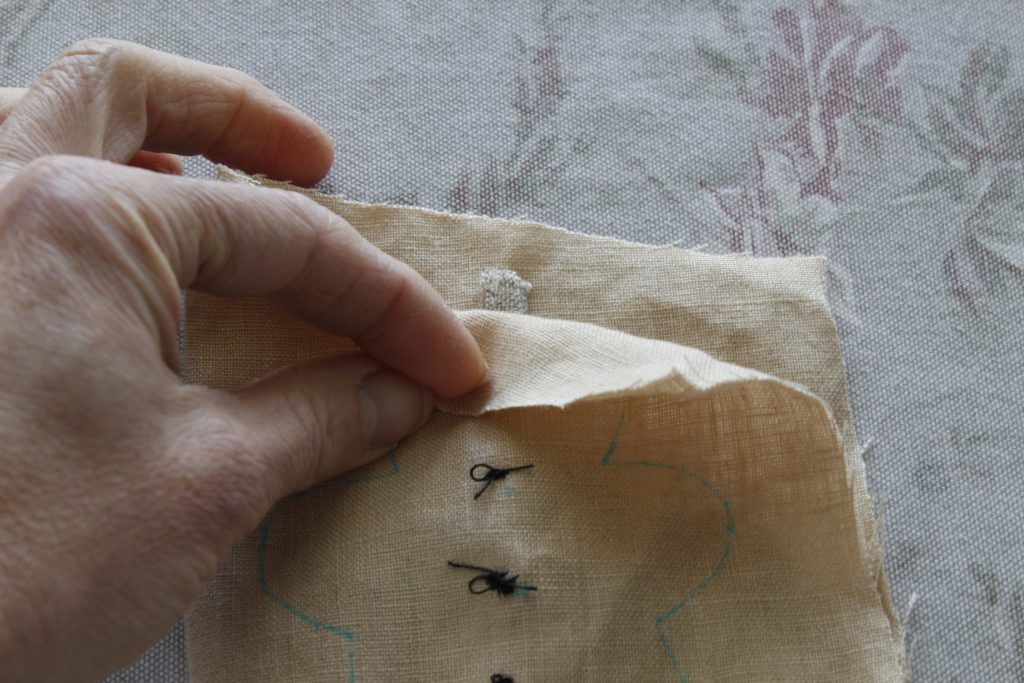
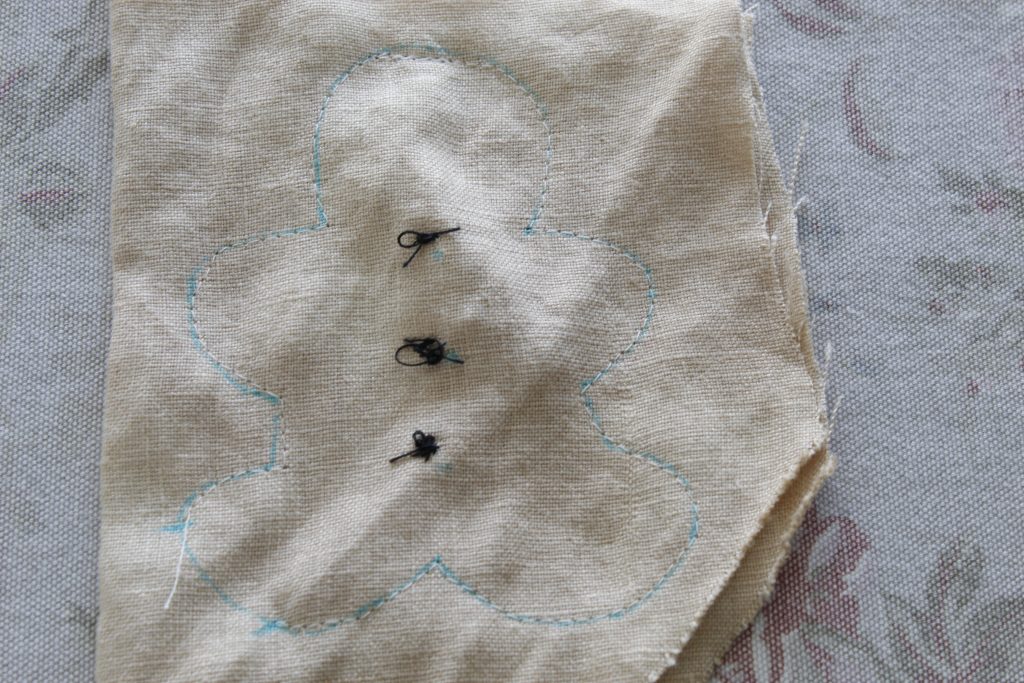
Sewing On The Buttons
Several years ago, I found a treasure at a thrift store fabric sale. This jar was almost entirely filled with shell buttons, along with other vintage white buttons. If I remember correctly, it was $1.00. I was thrilled!

So I used small, 1/4 inch shell buttons for the belly of my gingerbread man. Use any buttons you like, but small sizes will be most appropriate on your ornament.
I made marks for the placement of the buttons, as follows:

First Step- I placed three pins, about 3/4 inch apart, where I wanted my buttons to be.
Second Step- I pushed the pins through only the top layer of fabric.
Third Step- With my fabric marker, I marked a dot right where the pin was coming through the fabric, on the other side (the fabric’s right side). Then, I removed the three pins.
So, in this way, I marked the button placement on the right side of my gingerbread man.

Finally, I sewed on my buttons securely, passing through the holes three or four times to make sure they would stay put. I used black thread because I liked the contrast.
I put my fabric layers right sides together again, to get everything ready to put in the hanging ribbon.
Sewing The Hanging Ribbon
Next, I made the hanging ribbon for my ornament, for the purpose of using what I had on hand. You can do the same, or use any ribbon you like, as long as it is 1/4 inch wide, or smaller.
I made it using the same technique that I used on my Beehive Clothespin Bag.
But, in order to end up with the appropriate size for my small gingerbread man ornament, I used a strip of fabric much smaller. I cut a strip of linen to the size of 1 inch by 6 inches. So, the width of my finished ribbon was 1/4 inch.

Sewing The Body Of My Linen Gingerbread Man Ornament
First, I folded my hanging ribbon in half.
Then, I positioned it between the right sides together layers of fabric, making the raw edges come out the top of the head slightly. Lining up the hanging ribbon with the center of the gingerbread man, I pinned it all together, keeping the layers neat and straight.
I used a few more pins to hold the rest together.
Sewing with a straight stitch, I carefully and slowly sewed on my blue line.
I started sewing at one of the lines I had marked, backstitched, and continued up toward the head.
Sewing around the head was the most cumbersome part, but I sewed slowly, tapping my presser foot to get around the curve. I held all my layers together as I sewed, and reversed, and went over the hanging ribbon twice. Therefore, the ribbon was more secure.
I continued to sew on the line until I reached the opening, backstitched and removed it from the machine.
Turning My Ornament Right Side Out
Next, I trimmed my seams to about 1/4 inch wide.
At the spaces that were left unsewn, I made the seam allowance slightly more than 1/4 inch.

This was to allow plenty of fabric to sew the opening closed neatly.
So, then I turned my ornament right side out by pulling it through the opening, and pushed out the arms and legs. You can use the eraser end of a pencil, a dowel, a stuffing tool, or any blunt object to gently push out on the seams. Also, I pulled on the ribbon hanger to straighten out the head.

Then, I ironed my gingerbread man flat, and began stuffing.
Stuffing My Gingerbread Man Ornament
Although I prefer to use wool as stuffing, for this project I used an inexpensive fiber fill.
It is important to use small amounts of the stuffing at a time, because, otherwise your ornament will end up lumpy and misshapen.
I started the stuffing process in the arm and leg on the opposite side from the opening, using a stuffing tool that always comes in bags of Poly-fil.
Then I moved to the head and middle.
Finally, I ended on the arm and leg on the opening side.
Sewing Closed My Linen Ornament
After stuffing, the next step was to sew closed the one inch opening.
I folded the raw edges to the inside so that that part of the seam would be the same size as the rest.
Using thread that matched my ornament, I hand-sewed along the edge. I made very small whip stitches, as neatly as I could manage.

And it was all closed up.
Removing Water Soluble Marks
To remove the blue marks that were visible, I simply held a damp cloth against the marks and applied a little pressure. They disappeared in a few seconds.

It helped the overall shape to squeeze and manipulate my gingerbread man ornament a little, until he looked balanced and even.

And there you have it!
I hope you enjoy your own handmade fabric gingerbread man ornaments! Please tell me about your favorite handmade ornament in the comments below!
Thanks so much for stopping by The Rosemary Wreath,
Courtney

Leave a Reply