
Without apology, I lean in the direction of being a collector! I have a few stashes hidden away for creative projects. Making something from nothing is a very good skill, but to combine it with making something beautiful is even better!

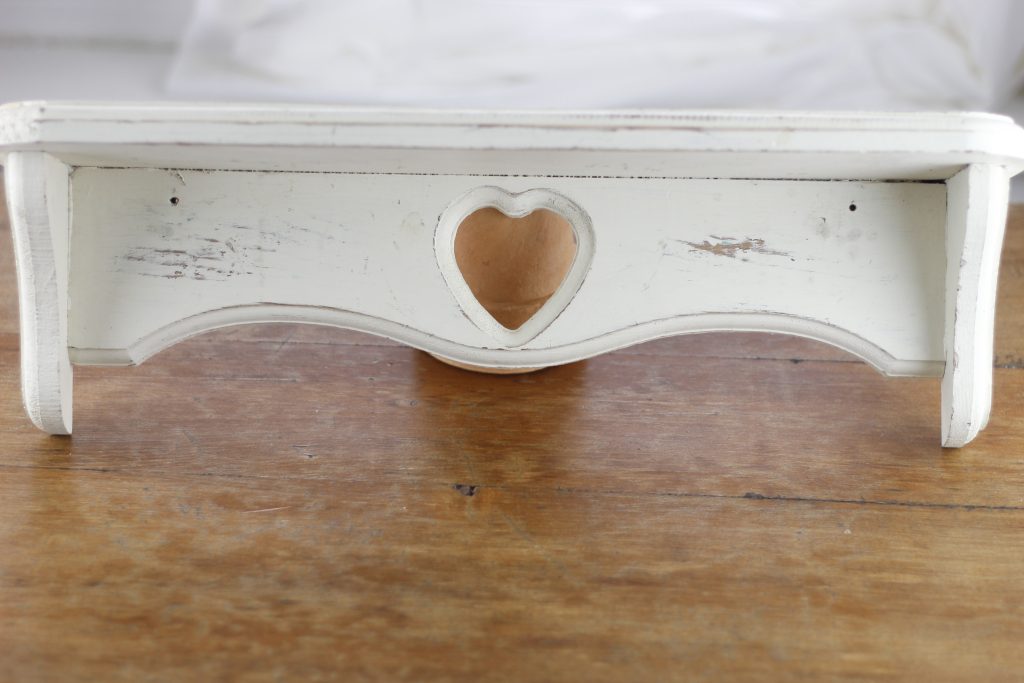
There is a hand towel holder in my bathroom that I have never liked. It is serviceable, but pretty boring. It has held up to a lot of use, but I am ready for a change.

Also, the sink in the bathroom is attached to the wall and has no countertop. It is small and the edge has a little slope into the sink. So there is very little space to put my make-up bag, bottles of essential oils or facial products.
As I am using these products, they often go crashing into the sink because of the lack of space.
I have various shelves like this that I have collected over the years, knowing they would be useful at some point.
Although it would be easy to buy a new hand towel hook, I want to be creative and use what I have stored up around the house.
So, I am going to make this shelf solve the problem of lack of space and hand towel hook. I like the creamy off-white color of the shelf so the color was fine as is. It did not need painted.
Using Paper to Make Something From Nothing
I am not fond of the heart cut-out on the shelf, so I brainstormed ideas to fill in the hole and then cover it. I decided to use some pretty paper to cover the heart cut-out on the shelf.
Whenever I am out and about, whether it is a craft shop or thrift shop, I keep my eye open for paper that appeals to me. Sometimes it is scrapbook paper or vintage paper scraps. Sometimes I find a greeting card that I can save for an unknown future project.
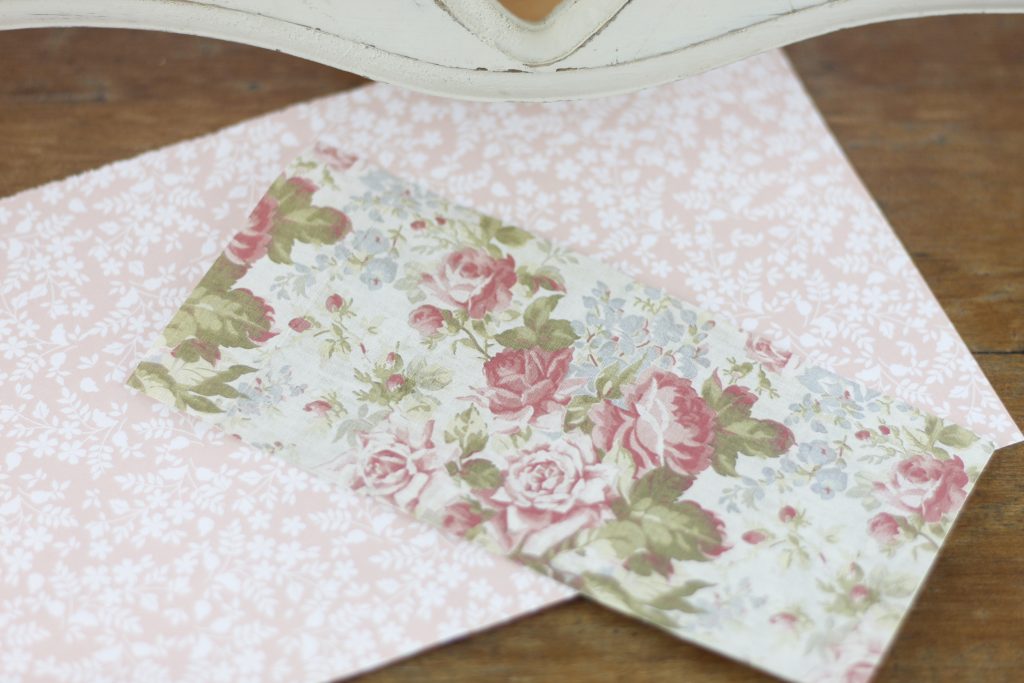
Finally I narrowed my choices down to these two pretty scrapbook paper pieces.
I spent a little while imagining how I could attach a hook to the shelf where there was a fairly sizeable hole. The hole is exactly where I wanted the hook.
Fortunately, I am very familiar with using papier mache clay. I have been working with the recipe from Ultimate Paper Mache for years and I love it! You can find the recipe here.
So, I thought of using the paper mache clay to fill in the hole and then also adhere the hook to the shelf.
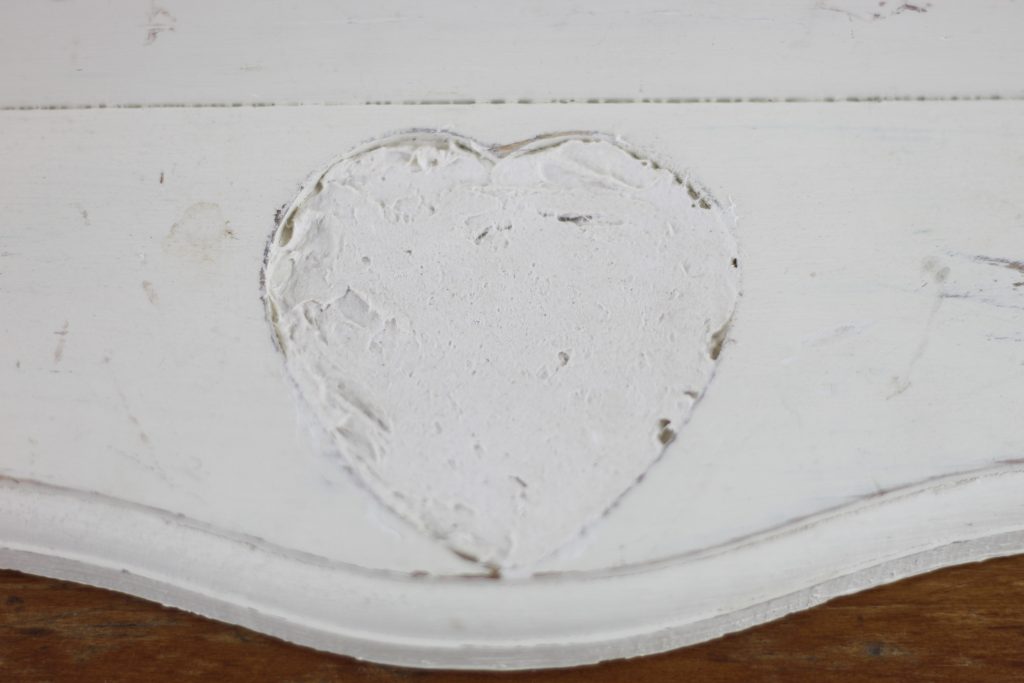
So, first I taped a piece of cardstock to the back of the shelf, to cover the hole. This gave the paper mache clay a boundary to rest against.


Next, I placed the shelf on a rag and layer of kraft paper to protect my work surface. I filled the hole with a layer of paper mache clay the entire thickness of the shelf, so that it was flush with the cardboard on the back.
Then, I placed the shelf in a warm dry place, our basement, to dry more quickly. Because the clay was about an inch thick, I left it to dry for two days.
At that point, it was hardened and did not make an indent when I pushed into it.
Now that the paper mache clay layer was completely dry, I covered it with a pretty paper.
Using Scraps to Make Something From Nothing
I decided on the off white with roses paper. The size of the paper was uneven and about 3″x6″. I cut a little off the one side and that left a straight rectangle of paper.
Along the bottom of the shelf was a beveled edge. I centered the paper on the shelf to cover the heart, then slid my fingernail along the beveled edge. This scored the paper in the correct shape to be level with the edge.
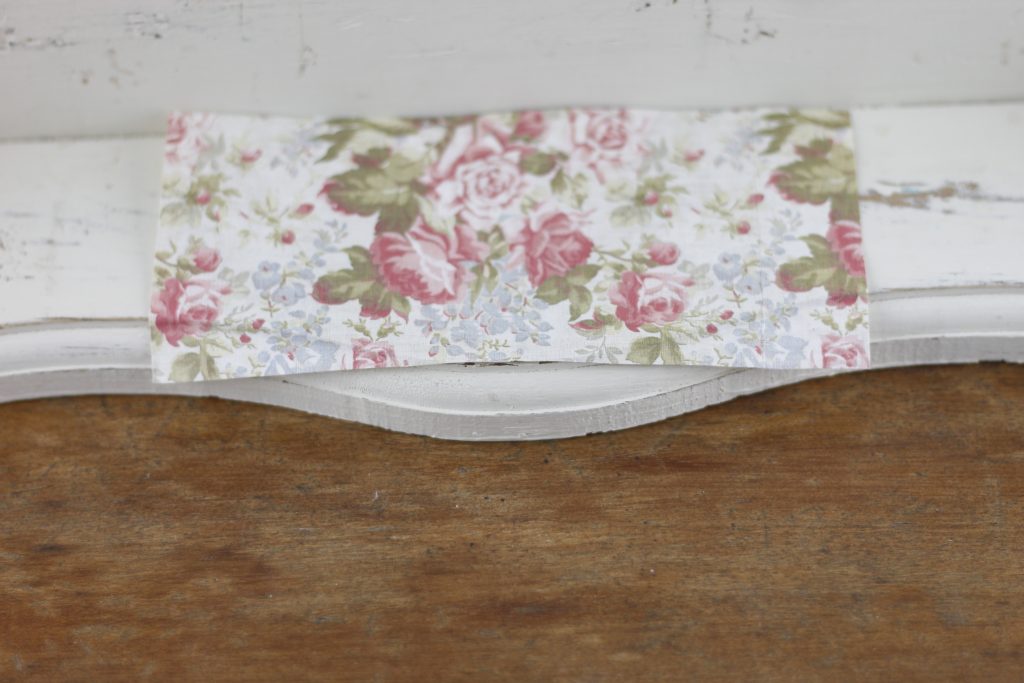
Further, I cut the paper along the scored edge.

Now For the Decorative Elements!
Next, I lined the edge of the floral paper with this glue
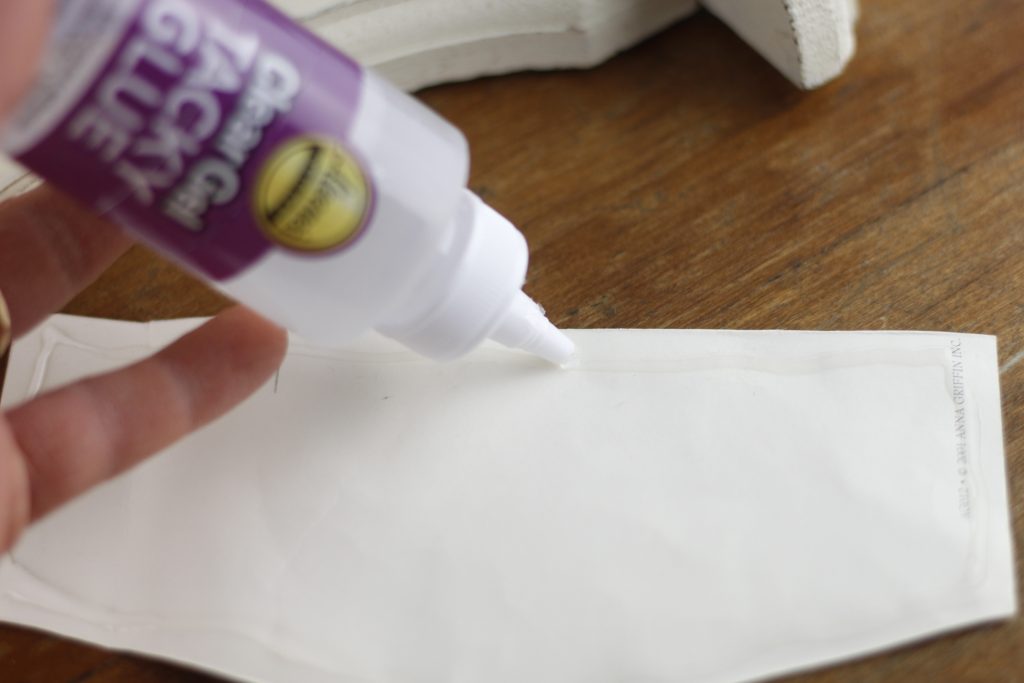
I prefer this glue because it dries very neatly and clear, and it doesn’t look messy at all.

After I left the glue to set for a few minutes, I sealed the whole surface of the paper with this varnish. I brushed over the edge a little onto the wood to be sure the paper stays down firmly to the shelf.


Also, I brushed the varnish from top to bottom and side to side. I pushed the varnish into the edge of the paper to cause a seal to form as it dries.
Attaching the Hook

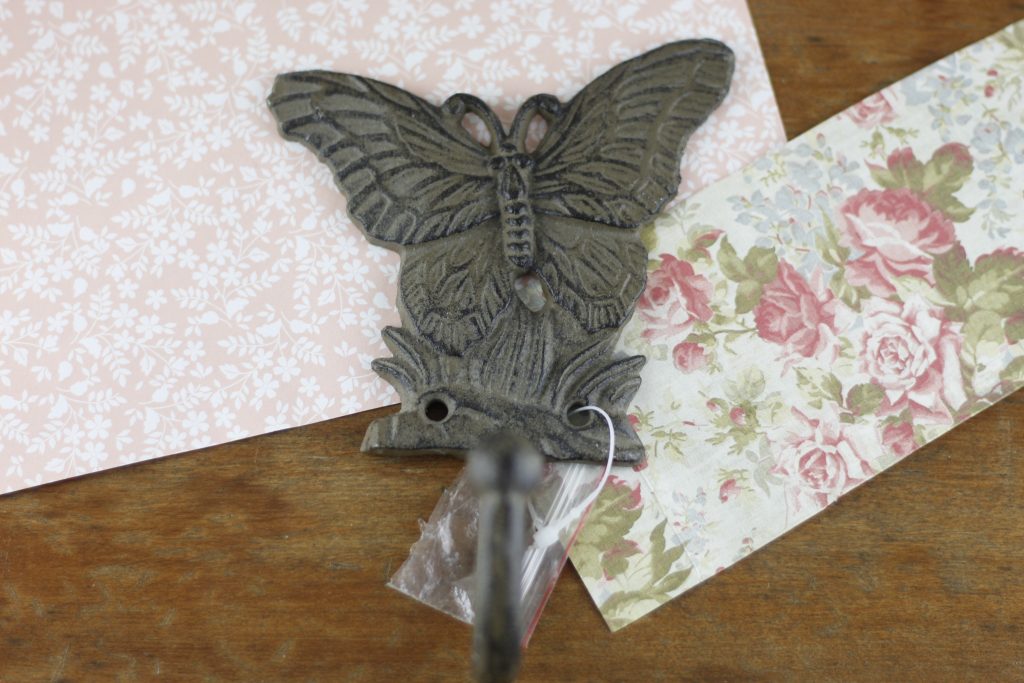
Now the shelf was ready for the attachment of the hook. There were two holes in the butterfly scene above the hook. These were for screws to attach to a wall. It would not have worked to screw the hook to the shelf, so I used paper mache clay to adhere it to the shelf.

Next, I put three “globs” of paper mache clay onto the back of the butterfly. I decided to put some glue on the paper mache clay as well. It needed to be fastened securely.
Afterwards, I turned the butterfly hook right side facing upwards and pushed it firmly onto the shelf.
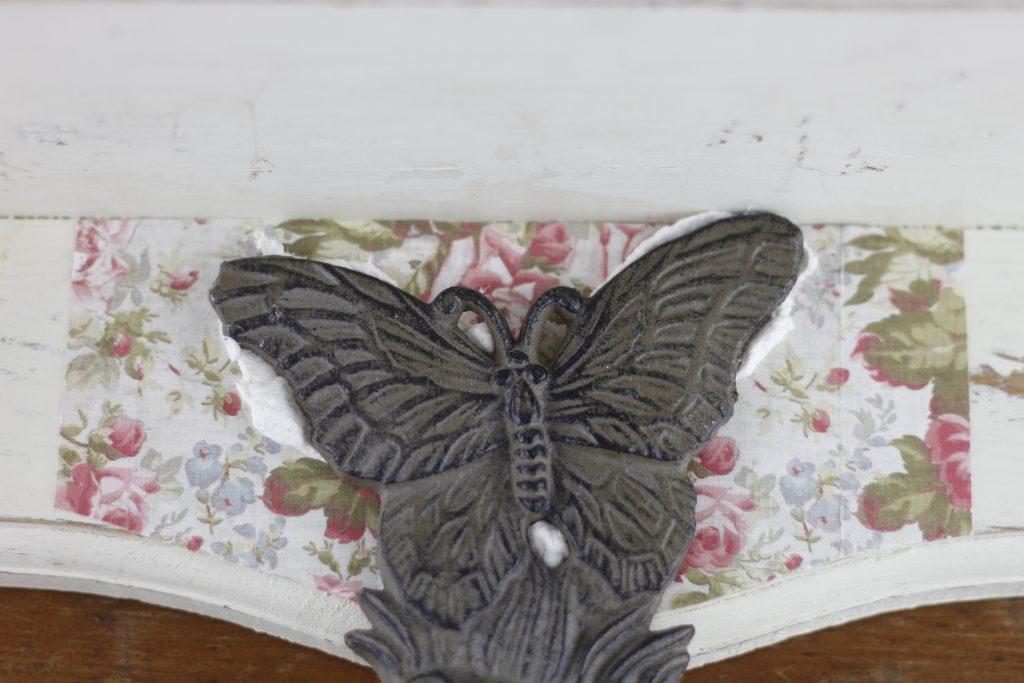
Then, I wiped off the excess paper mache clay and glue with a rag.
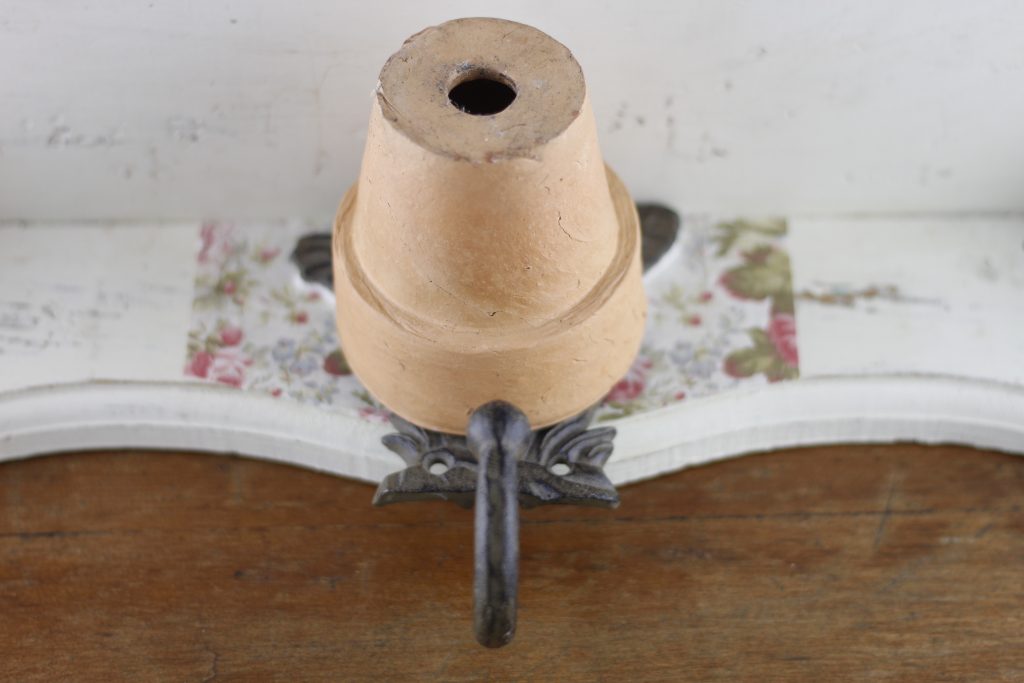
In order for the hook to stay put as it was drying, I weighed down the top with this cute little flowerpot.
The shelf was left for several days to dry.
Finally, it was time to hang this making something from nothing shelf/hook project!

Meanwhile, during the glue and paper mache clay drying times, this bathroom was painted a dark cozy blue! The color is Kensington Blue from Benjamin Moore.
If you enjoy the challenge and thrill of taking scraps and turning them into beautiful treasures, check out this post.
Do you have loved items stored away? Can you think of ways to make something creative of them? Give me some new ideas for making something from nothing. Please let me know in the comments!
I love this idea Courtney! It makes me want to re-purpose and re-create things at my house. Very beautiful!
Thanks! I am glad it has inspired you!
I love personal touches in all things, this is lovely
Thank you!
So cute! I’m with you in the collector department. Limited storage space keeps my collecting to a minimum, but I definitely get that urge. This makes me want to go act on it. 🙂
Thank you. I am trying to work through using the items I already have before I look for anything new! My storage is pretty limited, too.