
For anyone who is a beginner to sewing, these step by step instructions will be a help to you. My post on How To Thread A Sewing Machine will give you a start in the right direction.
When I first started sewing years ago, I felt so lost when I looked at my sewing machine. I didn’t feel up to searching through my manual to learn to thread it. At seventeen, it was daunting. It is so funny now, but the person I turned to for help was my dad. He remembered what he had learned in home economics and walked me through the basics of threading my sewing machine.

Sewing machines have their differences and the way they are to be threaded varies from brand to brand. In fact, my first sewing machine was similar to this one, and more simple to thread. My current sewing machine is this one from Singer. It has a couple extra steps involved in threading it.
I will show you how to thread my current machine, but there may be slight differences in your machine. That being the case, just consult your machine’s manual.
The First Step

There is a rod at the top of the machine, beside the handle this is a thread holder. Remove the white disc to attach the spool of thread.

Slide the thread spool onto the holder, with the thread unwrapping in a counter-clockwise direction.

Slide the white disc back into position against the spool of thread, to hold it snugly in place.
Thread A Sewing Machine

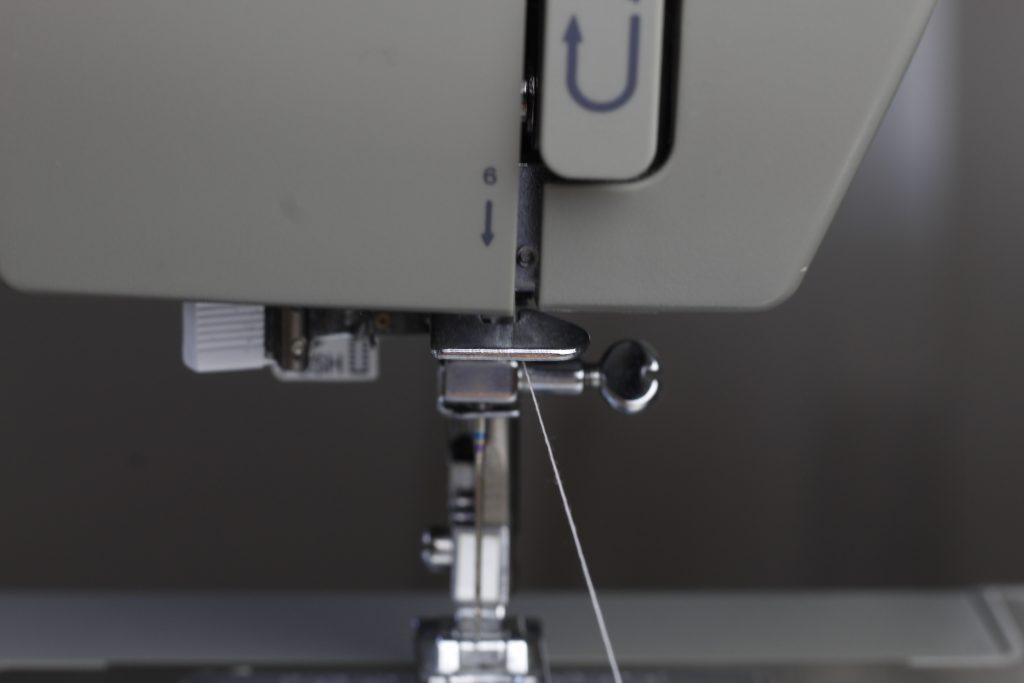
Next, gently pull the thread and slip it under the hook at the top of the machine, there is a number 1 there with an arrow showing the direction in which you are to take it.
After it goes under the hook, there is a 2 showing where it is to go next. Hook the thread around that, which is a larger hook at the top of the sewing machine. Guide the thread past the number 3 and guide it to the next step.


There is an open groove on the sewing machine where the thread rests against, below the number 4. Bring the thread past that. At the number 5, there is a large hook at the top of the sewing machine.
At the number 5 there is a large hook at the top of the sewing machine. The hook moves up and down, when the wheel at the right of the machine is turned. Consequently, to make it easier to place the thread around this hook, turn the wheel until you see it more clearly at the top of your sewing machine.

Put the thread around the hook at number 5 and bring it down past number6

Below that, there is a silver somewhat square piece of metal that has a hook section towards the back of it. The thread will now go around that.
Threading The Needle
Finally, the thread is ready to go through the sewing machine needle!

Before you attempt threading the sewing machine needle, I recommend snipping off the end of the thread with sharp scissors to neaten the tip. As a consequence, this will make the needle much easier to thread.
Great job, the top threading of your sewing machine is complete, now onto the bottom threading!
Inserting The Bobbin

First, remove the door from the bobbin housing. There is a button to the right of the door that releases it. Push the button to the right and the door will pop up.
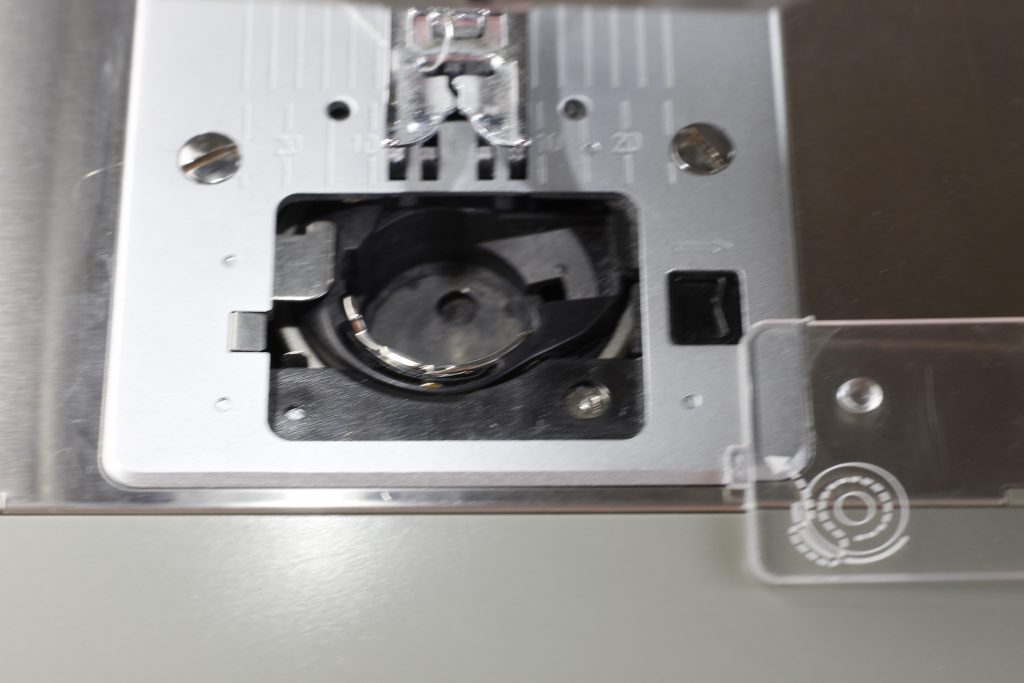

Following removing the cover, with the thread unwinding in a counter-clockwise direction, place the bobbin into the bobbin housing.

After the bobbin is in the sewing machine facing the correct direction, pull the thread slowly until it catches under a little notch. The notch is on the bottom left side of where the bobbin fits against. Furthermore, continue to pull the thread until it slides under the little notch and then out the back.


Now, you are ready to begin some basic sewing projects with your threaded sewing machine! You may like to try something simple like napkins or a table runner.
What simple sewing projects are you interested in trying? Let me know in the comments!
Leave a Reply